Automata Drilling Needs
Precise drilling of holes is key in making smooth acting automata projects. Holes must be accurately located and square to the components. I often require drilled holes to be to 1/64" precision.
Drill Press
A good drill press is a must have! A floor standing drill press is preferred in my book since some of the bench mounted ones have weaker tables. I suppose if it is all you have you can get by. There are however several times when I use a lot of the throat space available on my drill press. Using extra long drill bits to drill through character bodies and drilling holes in assembled cases are two that come to top of mind. My drill press is a Rexxon, a brand name of Busy Bee Tools here in Canada. It is however, of Asian origin. It is another shop tool that predates my career in automata making.
A light is a good addition. The one in the photo is an after market lamp with a magnetic base. A light is necessary to locate hole centres accurately. A depth stop is used frequently for making blind holes for the ends of shafts. There is really not much remarkable about my drill press; most any should do.
You will notice that I keep a table on the right side of the drill press. While I normally keep my drills in the top drawer you can see how in the middle of a project things migrate to the readily accessible top! You can see three drill boxes in the photo, regular twist drills, brad point drills, and forsner bits. These are the staples of drilling for me. And just in case you haven't found this tidbit elsewhere on my site I always use an awl to mark the centres of holes before drilling so the brad point and Forsner bits self centre when starting to penetrate. Oh, just in case you are wondering I don't use my grinder in the position shown here! I merely store it there and drag it to my bench top when I use it.
Back to the side tables for a minute, when clean they are a great place to lay down components queued up for drilling. No stretching, bending or twisting required.
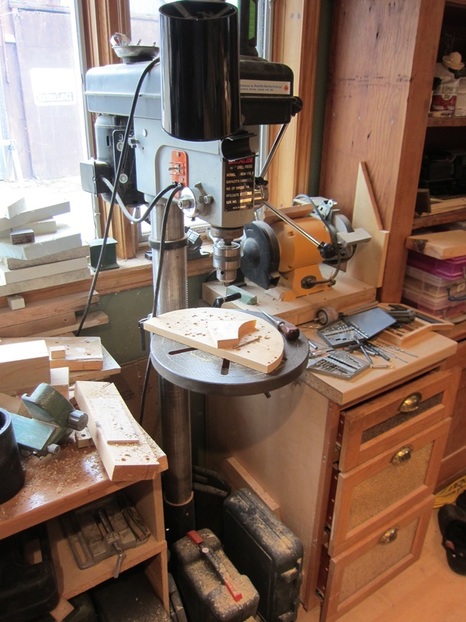
My floor standing drill press,
Drill Press Vices
I use two drill press vices. One is very small. I got it from Proxon when I ordered some blades one day. It is very handy for holding very small components when drilling them. The second is a larger more traditional vice but its best feature is that is can be used to tilt a workplace for angled drilling. Its much safer than trying to do it with a hand drill! When you need it is the best thing since sliced bread. Both these are pictured below on the table.
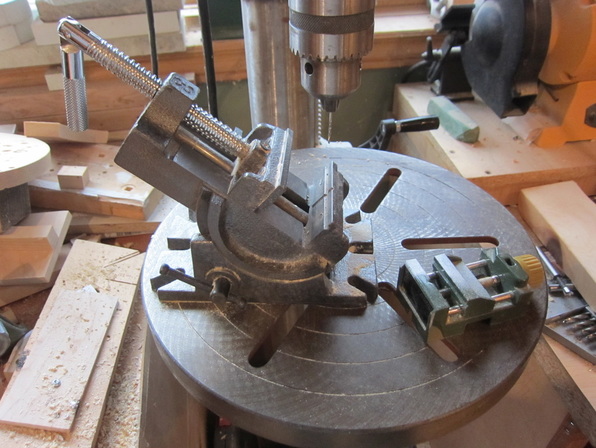
Drill press vices
Drill Bits
I use Brad point and Forsner bit the most in my work, even using Forsner bits down to 1/4" diameter. When drilling shaft holes for cams and gears I use them to carefully locate the tip in the awl punched guide hole and drill thru the stock until the centre tip just penetrates the other side. I then flip the stock over and use the tip hole as a locater to finish the hole. This eliminates breakout on the back side. With smaller Forsner bits you need to retract them frequently when drilling to clear chips. If you don't they will pack up with chips and then shed them around the outside of the bit leading to an oversized hole. It is not a problem with larger bit sizes.
Larger Forsner bits are used to rough out the inner cavities of automata characters. You have to think about this as you cut them out. You will need to leave a flat surface on some face to make the drilling safer and easier. Afterward you can cut the surface off. Don't even think of trying to use a hand drill for larger Forsner bits!
Larger Forsner bits are used to rough out the inner cavities of automata characters. You have to think about this as you cut them out. You will need to leave a flat surface on some face to make the drilling safer and easier. Afterward you can cut the surface off. Don't even think of trying to use a hand drill for larger Forsner bits!
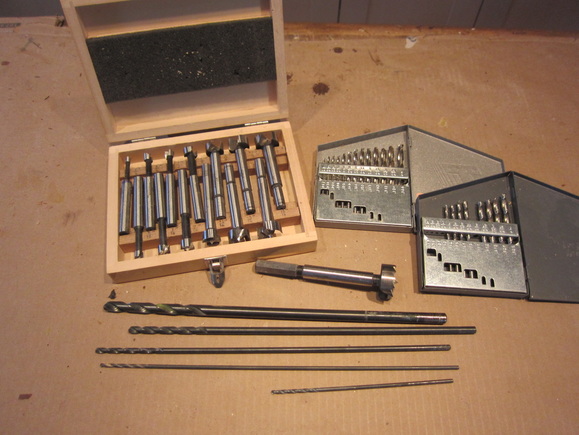
Drilling most holes with Forsner and brad point drills means I only use twist drills for reaming holes to a larger diameter. Above you can see a collection of the longer bits use occasionally.