|
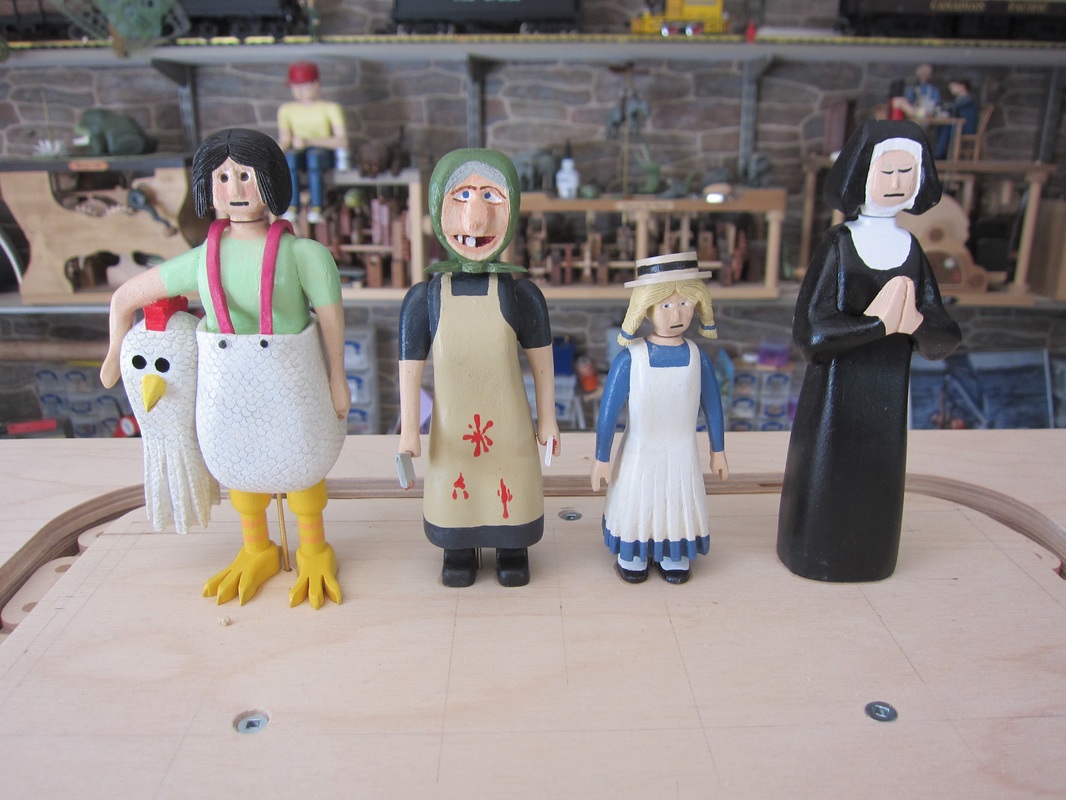
Here is the completed lineup candidates standing waiting for the viewing room to be built around them. Meanwhile the witnesses are being assembled.
0 Comments
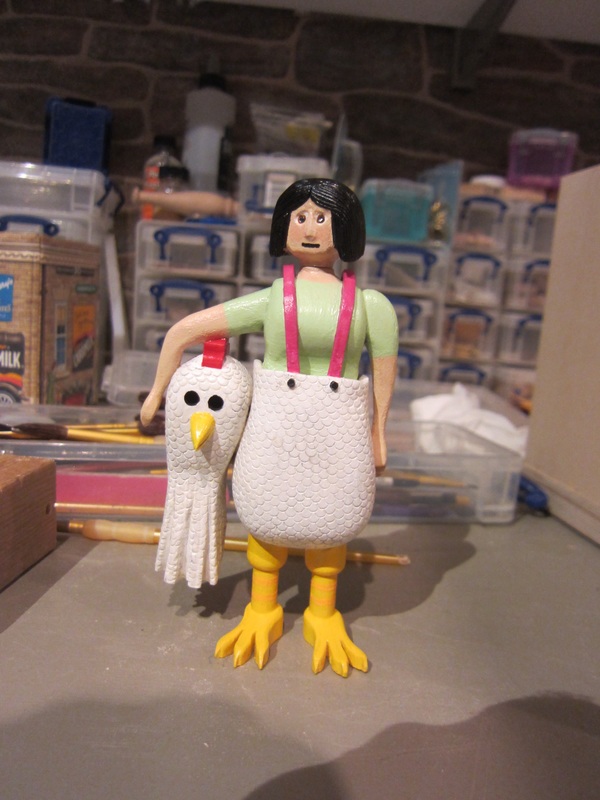
She's got her paint on and she's ready to join the lineup! Meredith is a poor college student trying to make money to live on while at school. She obtained a job standing on the curb trying to draw customers into a discount warehouse sale while wearing a chicken suit.
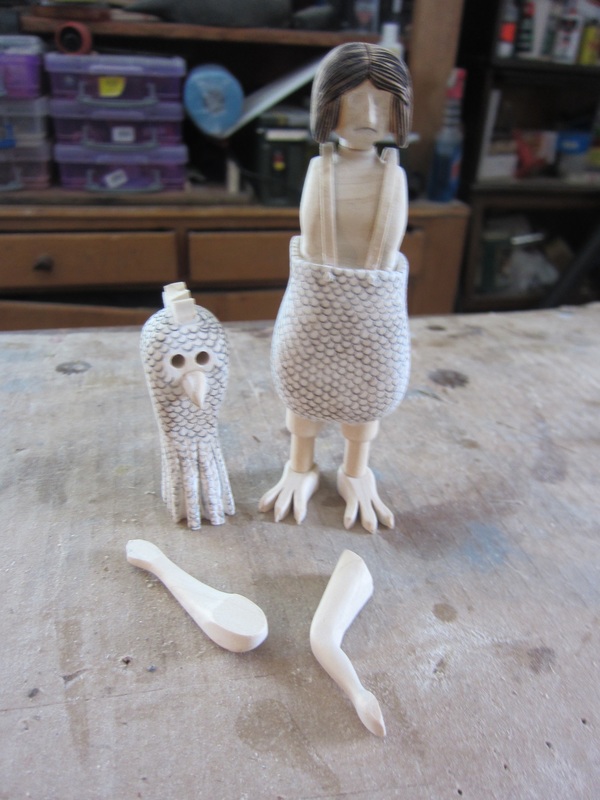
Apparently a deputy of the Chicken County Sheriff's office was passing by and believed she might be connected to the murder. He put her into the back of the squad car and brought her in for the lineup. Needless to say she is not impressed and threatening have her college activist friends stage a protest on the steps of the police station. She obviously is not having a good day! Anyway here is Meredith as she will appear in the lineup. It's getting down to the end now, just arms, her chicken costume hood and paint to go. Here are the last pieces. I will paint them before I attachment them to the body since some of the areas would be hard to paint if assembled.
When you do pyrography the bottoms of the profiles can get a little burnt, especially when doing the the deep stuff. If you are going to paint the finished product a light colour, it can often bleed through. To prevent this I coat he area with a sandable sealer which gets into the crevices and prevents bleed through before painting. Here's my chicken girl after an application of sealer.
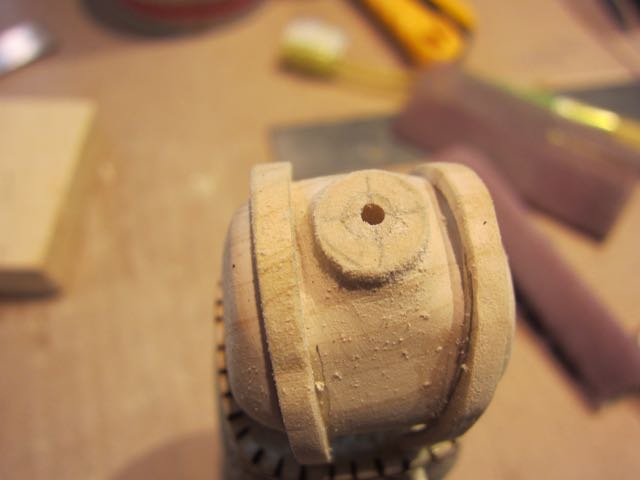
I mentioned that when I drilled the 1/8" hole through the body, that I would come back and place a small collar in the neck to reduce the hole size. You can see that I drilled out he neck to glue in a short 3/16" diameter dowel and then drilled out a 3/32" hole. This will act as the bearing for the upper end of the 1/16" diameter actuator rod. In this way the head will not wobble around as it turns.
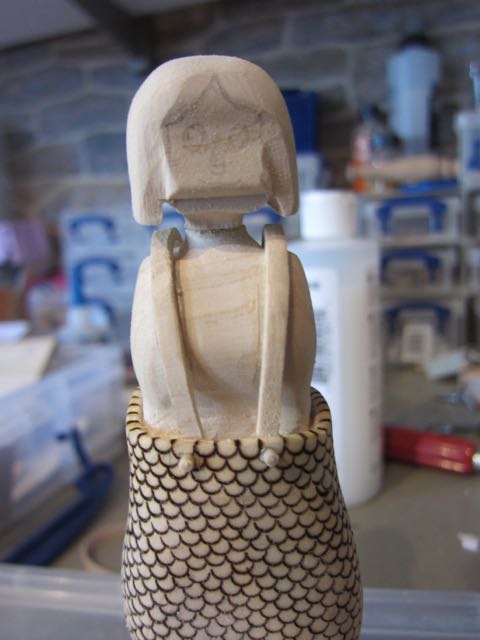
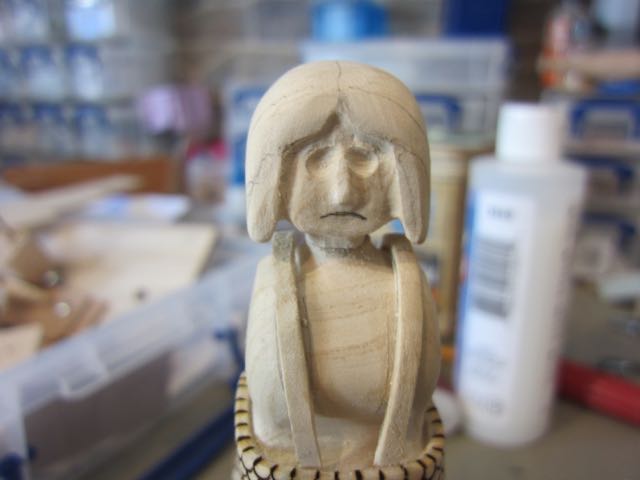
The next trick is to cover the chicken body with Gesso or sandable sealer. It is excellent to cover the charing marks on the pyrography, a really necessity if you are planning to paint something light coloured, like this white chicken suit. Since I will do her hair colour dark, it is not necessary for her hair. Next I decided to attack the head. I drew the face and hair details on the blank and proceeded to sand the blank into a round shape concentrating on just the hair. What you can see is a Bart Simpson looking character with exaggerated lips and lower jaw, and yes I did trim her hair to avoid contacting the suspenders. Next I provided relief for her face and chin. She is a little sullen looking with sunken eyes and penciled grimace. Remember that there whole head is about 3/4" tall, so there is a limit to the detail. I consider myself an automata maker not a miniature carving specialist! The right paint application will make her presentable. Like the chicken feather detail, using pyrography to detail the hair also goes a long way to define a characters look. In this photo the burn marks are fresh and dominate the hair appearance, but with the right paint job she will come to life like a Clairol commercial!
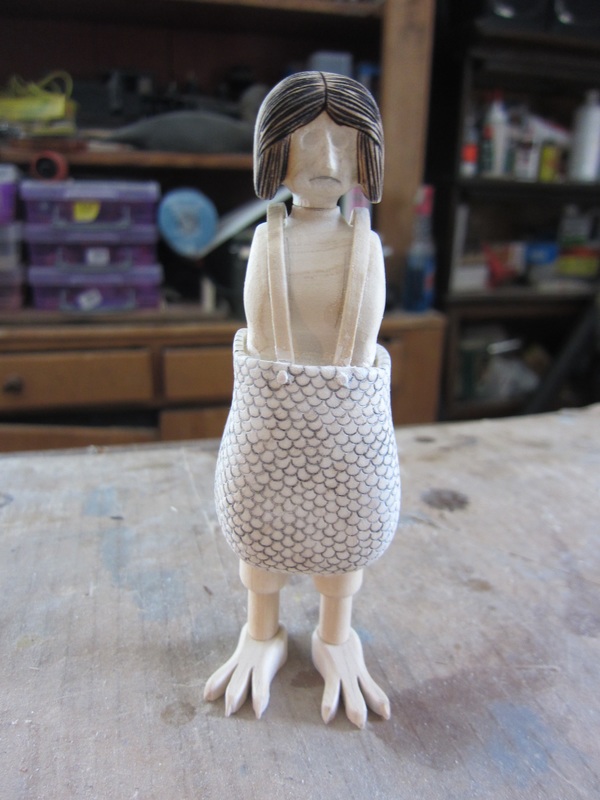
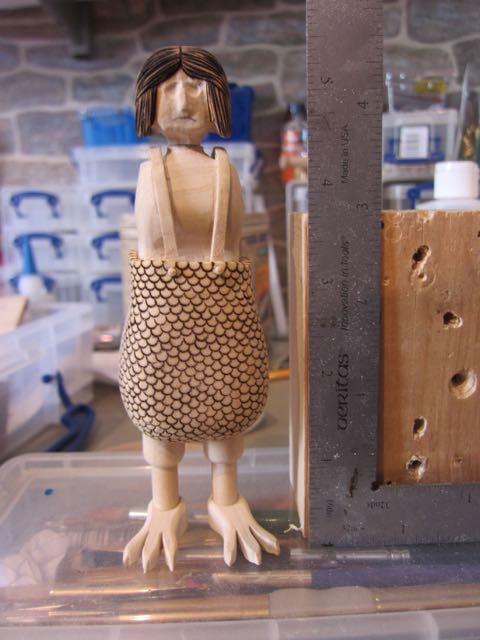
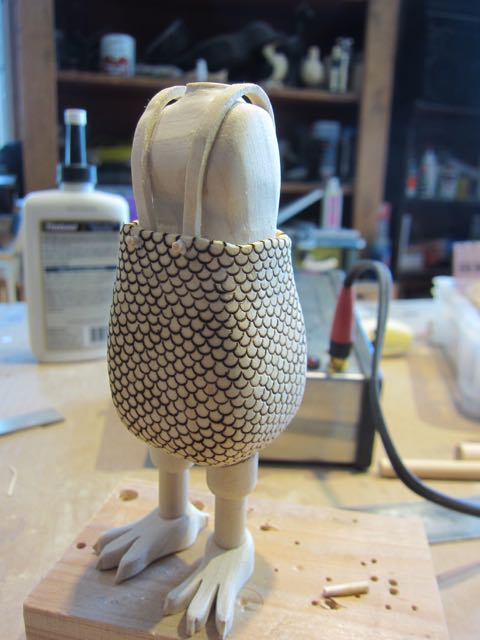
You can see below that our little chicken lady stands just about 5-1/2" tall. Now she needs arms! Painting the bottom of the chicken costume white would look okay, but a little texture goes a long way! I used my wood burner to burn feather shapes onto the costume. The shapes are actually fish scales, but they'll do fine for this. Here is our young lady after about 45 minutes of "burning" feathers onto her suit bottoms. You can see I've also added a few suspender buttons which will stand out with a little paint. Again, adding these miscellenaeous details will help compensate for the absence of other fine details. Remember this character is not the star of the piece!
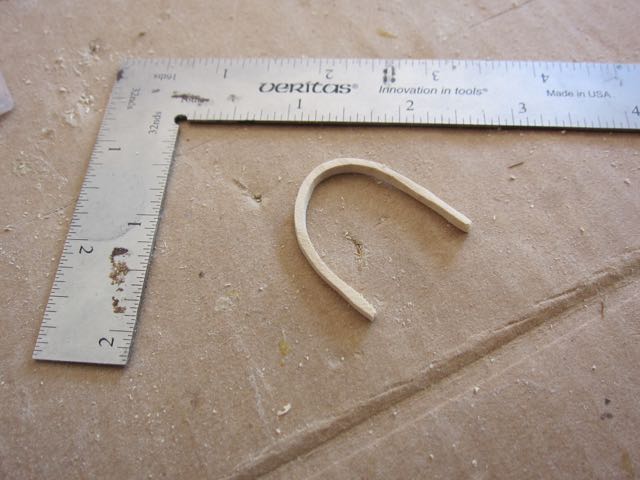
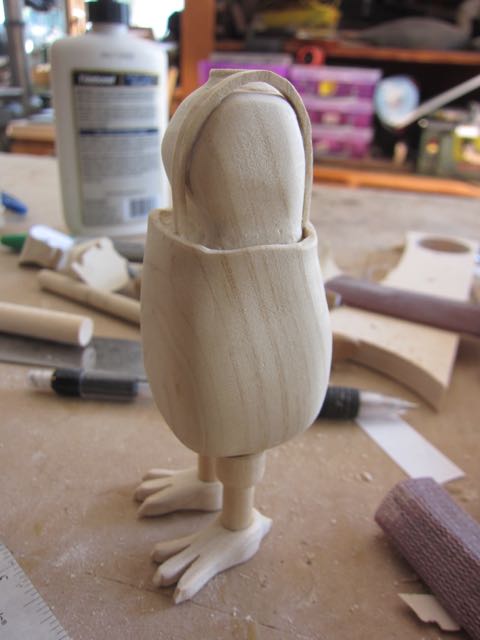
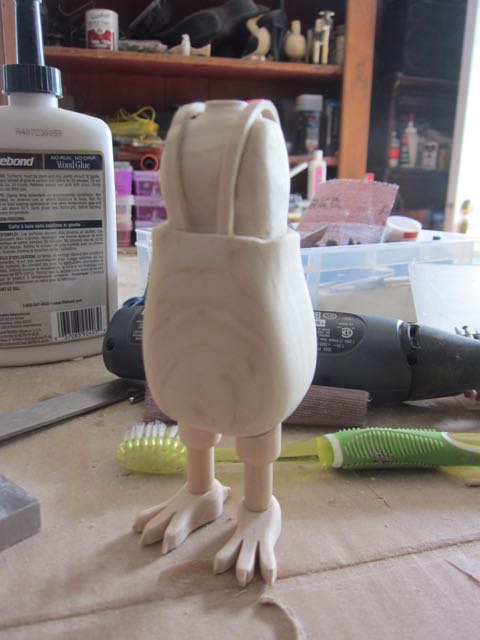
Obviously such a large, sloppy fitting chicken suit will require suspenders to keep things up on our young lady. They should further enhance the clownish look and add a little more interesting detail to a character who's facial features will be too small to stand out. I chose to make the suspenders out of Tupelo scraps. In the past I have used hardwoods like maple for items like this so they will not break easily. Since a lot of the surface of these suspenders could be glued securely to the body, I decided to use Tupelo and work carefully. I finished shaping around the neck and sculpting a flat area on each shoulder for the suspender piece to align with. Holding a piece up to the body I marked the inside profile needed to fit the body. I cut it on the scroll saw and with a little sanding I got a shape that contacted the body on the front and back slightly. I them shaped the outside so the suspender was about 3/32" think. See the photo below of one suspender. A whole lot of precision is not needed here as it will not be easily noticed. By sanding the shoulders down a little I could get it down fairly snugly. I widened a the space on the back of the body to fit the end of the suspender, and trimmed it to the length that left it "tucked in" on both the front and rear. Here is the suspender in place. It is glued on the chest and back and inside the front and rear belt lines. On dry it can be sanded or shaped a little in place. Repeat the process and you have something like this. A thing to watch is that the length of her hair does not interfere with the suspenders as the head rotates. If it does you'll need to give her hair a trim! My head isn't made yet!
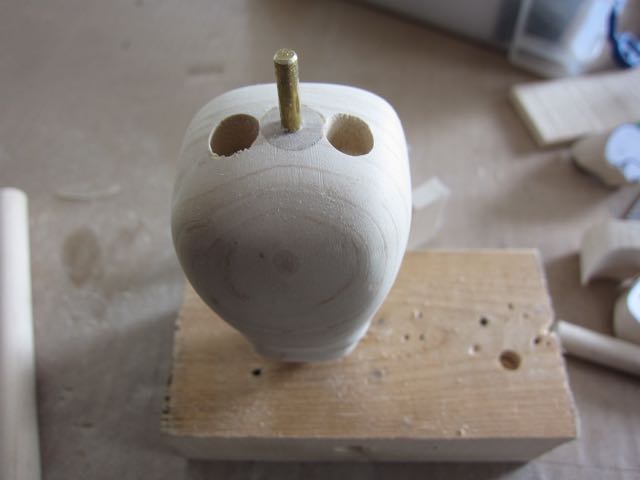
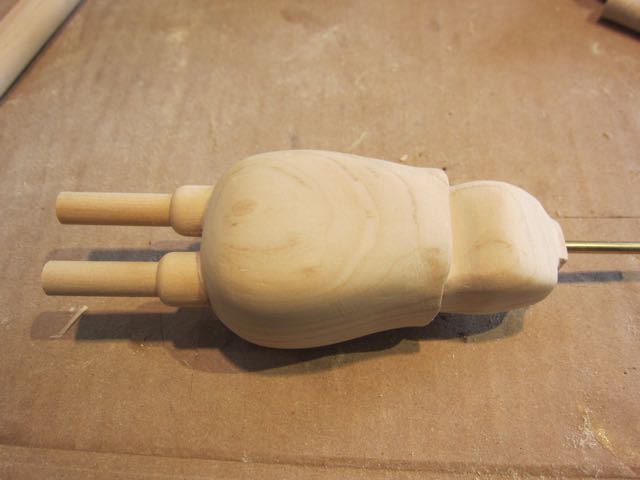
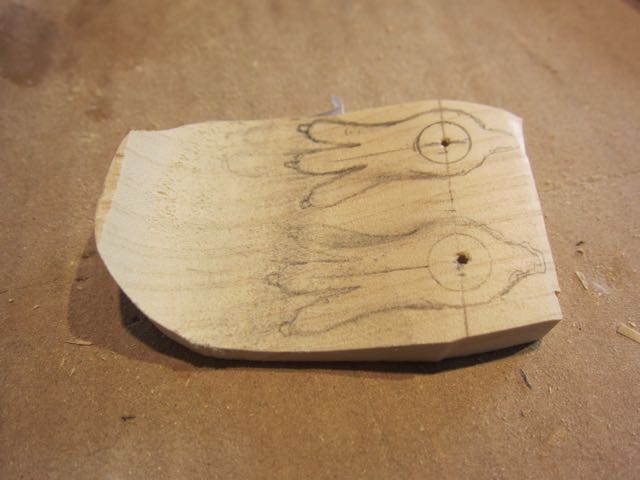
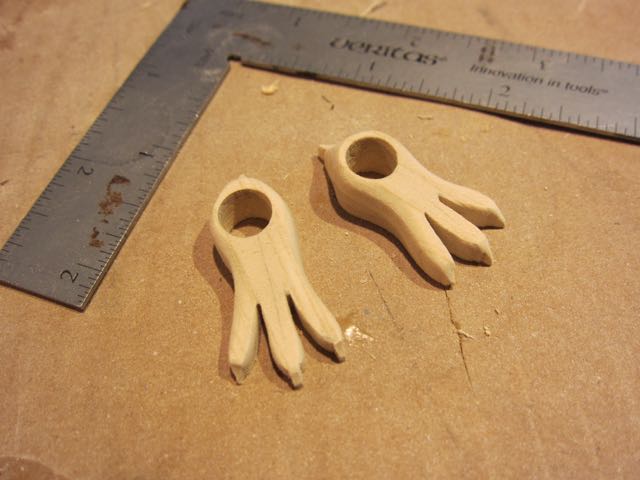
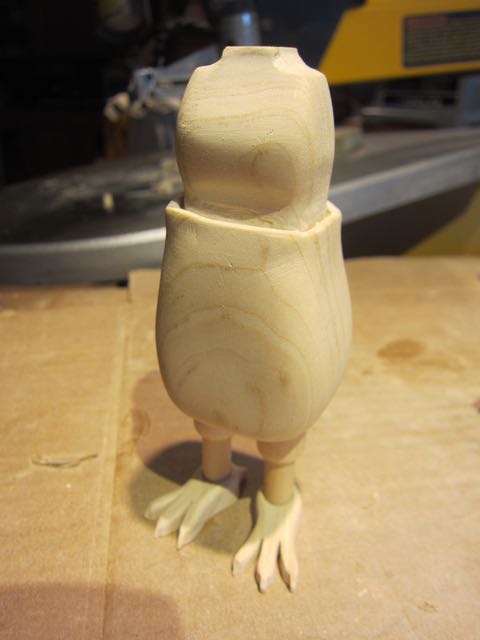
Sometimes I wonder what guides me as I make these. This time I decided for some reason to make the legs next. I wanted the costume to be a little clownish, so the legs would be a good selling point for this. First, I want point out a little fix. In a previous blog I mentioned that it was sometimes difficult to get long small drills to track correctly through the body block. I was not happy will this one so I made a correction. You can see the result in the next photo. Drilling from the bottom I drilled a new 1/8" hole up to the neck hole. The exit hole on the bottom was not close enough to centre for my liking. After establishing a new path I drilled out a 3/16" diameter hole in the bottom about 1/4" deep and glued in a piece of dowel. When dried. I drilled a new 1//8" hole through in the correct centre. You can see the finished repair in the photo. The dowel, now sanded to shape, is between the two leg holes. (The 1/8" rod is installed to hold the body vertically straight while the leg holes are drilled - next step) I used 3/16" dowels for the legs. I wanted them larger at the body, but drilling larger holes risked cutting out material the body as I drilled so I decided to make collars to slide over the dowels instead. Using the jig shown above I located and drilled the leg holes. I then took a length of 1/2" dowel and drilled it out with a 3/16" hole and cut it into two short pieces. I rounded the lower ends by sanding to represent the bottom of the knees, and by inserting the dowel into each leg hole and shaping the top profile of the collars with a Dremel to match the contour of the body I was able to get the effect I wanted. Here's a photo after this step. I used a scrap of Tupelo from the cutoff from the body block to make the feet. Here are the feet cut out. They are about 1-3/8" long. Long feet add to the clownish appearance - well to me anyway! Here's are chicken maiden now, legs cut to length and feet attached. It is important she stands straight so the actuator rod has free movement. More to come...
The continuing story on making a simple automata character...
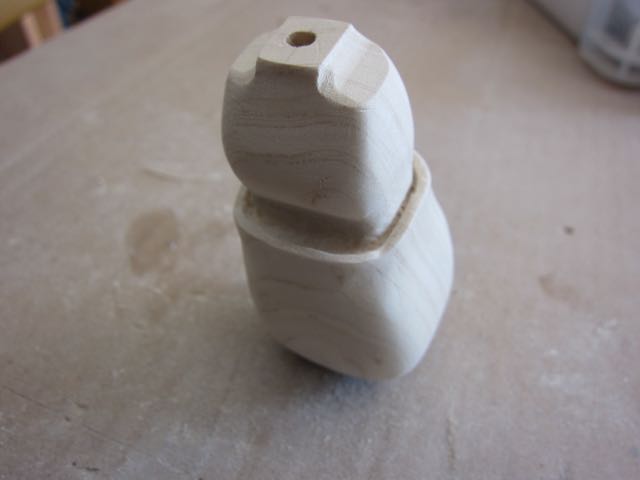
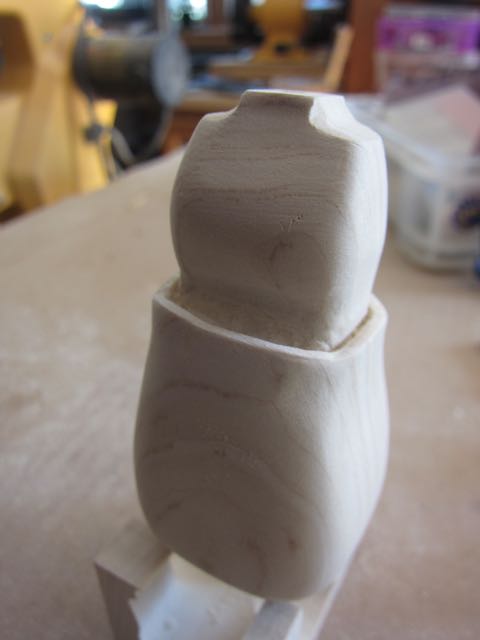
The next step is to start shaping the body from it's square block into a more shapely profile. First job is to round the lower part of the chicken costume into a round shape. I use a small sanding drum on a portable Dremel tool to symmetrically chew off the corners until things are rounded. I then smooth the entire surface by hand sanding using #120, 240, and 400 sandpaper. The next job was to shape the body section of the girl. I shaped the torso into a smooth shape, and then using diamond bits on the Dremel tool cut the recess around her waist that becomes the top of the chicken suit bottoms. This need not be too deep, but it is a good feature to provide some interest and dimension to this small character. It will also provide a connection point for her suspenders. Here are a couple of photos after this has been done. Notice the neck and the shoulders have not been shipped yet. |
Why Automata?Automata is a creative blend of my life interests , engineering, art and woodworking. Archives
July 2022
Categories
All
|
 RSS Feed