|
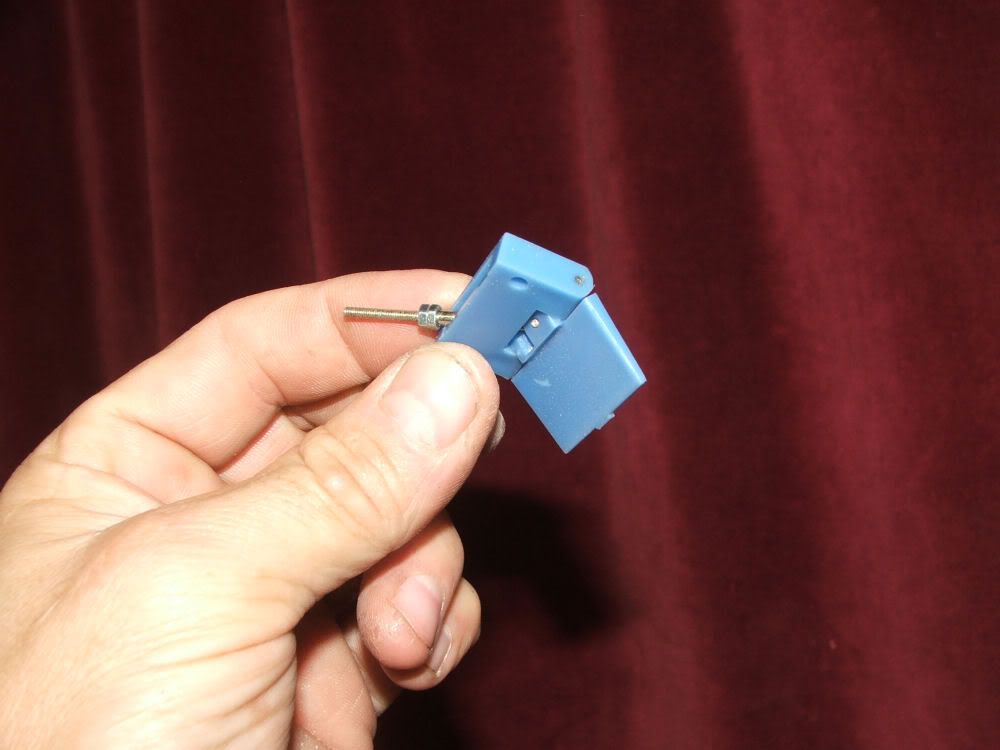
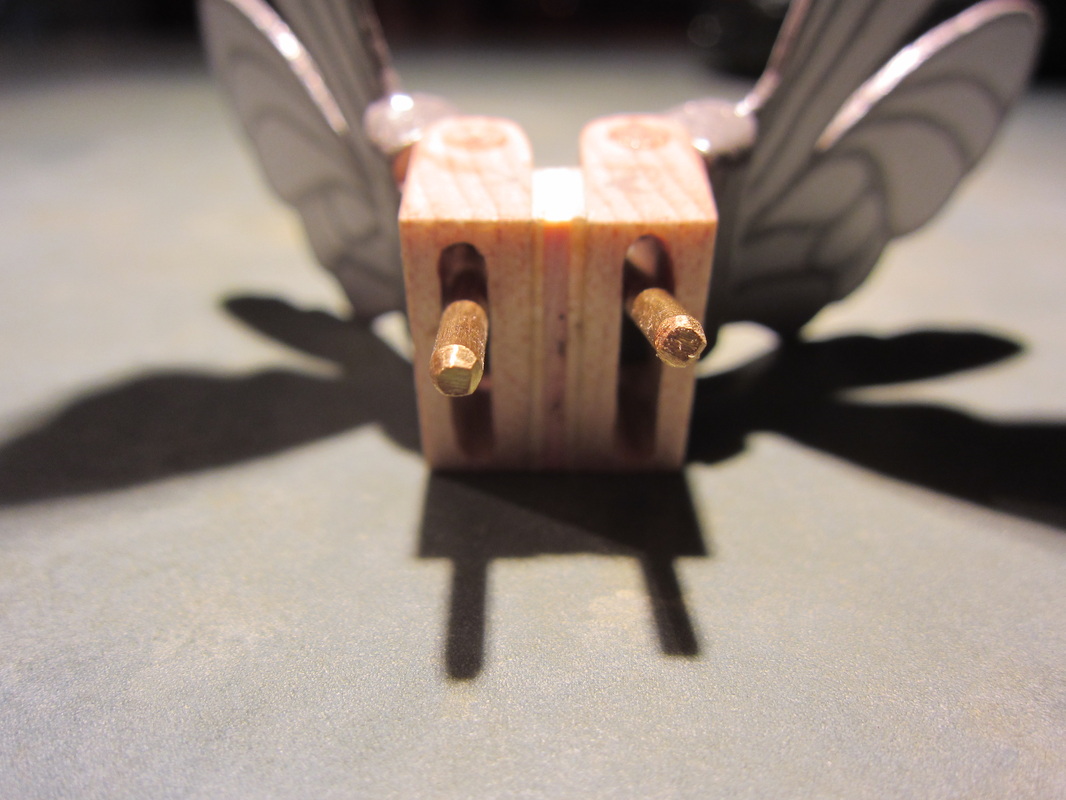
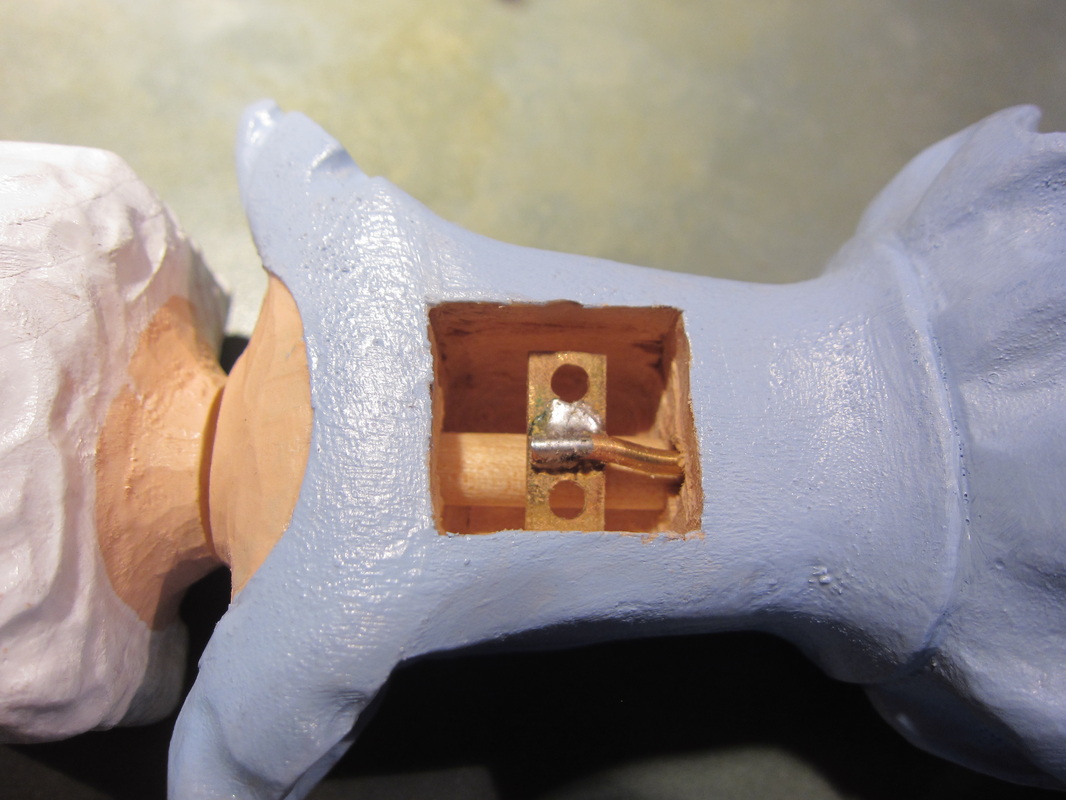
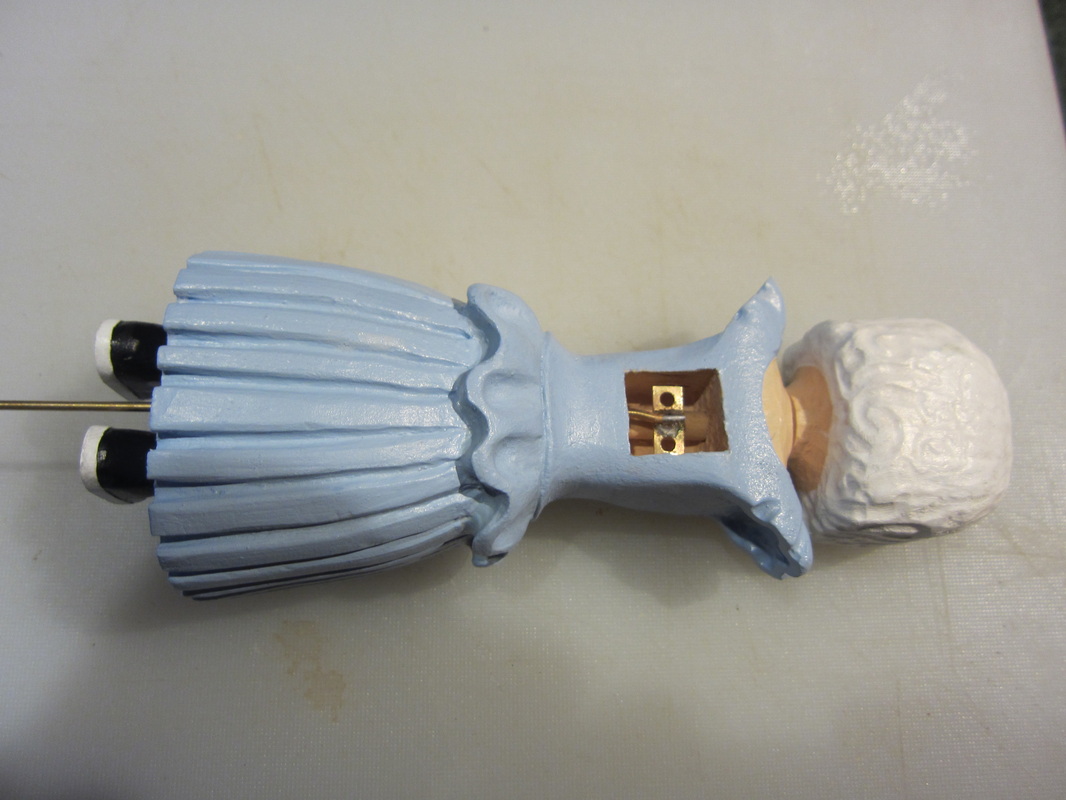
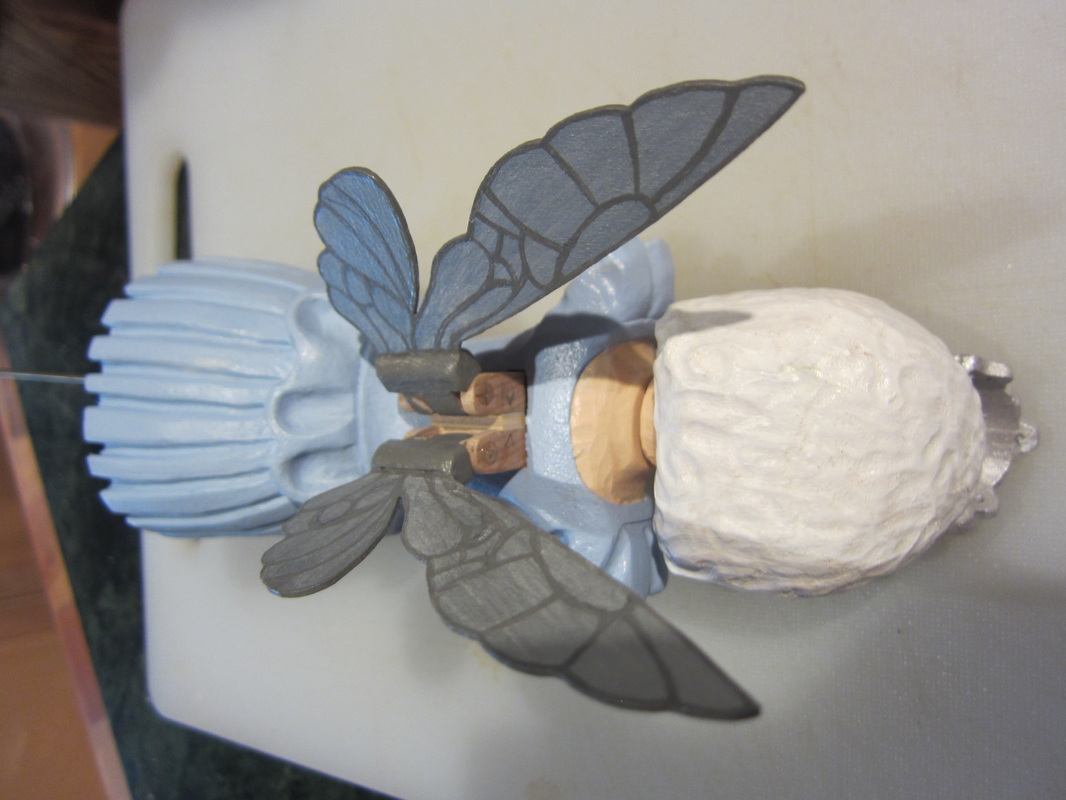
I've had a few questions from web visitors about how to "activate" the fairy wings that I had shown in a previous blog. So I hope this helps. First let's revisit the hinge design. The photo below shows a commercial "Swingee Hinge" used by model aircraft builders used to control ailerons on model aircraft. By pushing the small threaded rod with the nuts on it up and down the flap on the right of the photo waves back and froth. These are available on the internet from hobby suppliers. As I stated in my blog I wanted to stay true to my craft so I built two out of wood and brass, one for each wing of my tooth fairy character. Below is the assembly I made showing two hinges separated by a 1/8" spacer. The spacer merely allows more movement of each wing without interference with the other and to also "straddle" a dowel used to turn the fairy's head (more below). On the rear, the equivalent component to the flap shown above, the two wings are attached. The wings are already painted because it is easier before assembly, but I will do touch-up after it is all put together. Note the brass rods protruding toward the camera. These are the actuator arms. They are not threaded as there is no access to them on assembly to fasten anything. Note also that the ends have being bevelled slightly to make it easier to install the rods through two holes in the activation plate. The first step in assembly is to cut a rectangular hole in the back of the tooth fairy to receive the wing assembly. Test fit the wings into the body. It should be a snug fit as it will be glued in place with adhesive around the outside of the wing assembly. This photo also shows the 1/4" dowel that passes through the cavity that is used to actuate the head on this character. The separation of the activation arms them to pass on either side of the dowel without interference. There is a 1/8" diameter hole drilled up from the base of the character that enters on the centreline of the cavity on the bottom. A 1/16" brass rod is inserted from below to be attached to the activation plate. This rod has a slight offset in the top to ensure it does not interfere with the dowel. The activation plate is made from a flat brass strip with holes drilled on centres that correspond to the the centres of the activation arms. The holes are slightly larger than the diameter of the arms to allow free movement while they move up and down. With some temporary shim material supporting the plate in the cavity I solder it onto the end of the brass rod. Below you can see the rod protruding from the bottom of the tooth fairy's dress. Once assembled, by pulling the rod downward, or letting gravity do its thing, the plate will pull down the arms making the wings flap. If necessary add some weight on the rod lower down. I will use a simple lever riding on a cam to push the wire upward and control wing movement. Now is the time to cut the arms to a length that is not to long and not to short. They should be long enough to not come out of the plate when moved through the full range of movement and not so long as to rub on the back of the cavity. This can also be controlled by how far you insert the assembly into the cavity. Below you can see the wing assembly being pushed into the cavity. Of course patience is required as it usually takes a few attempts to control the wiggling wings and push the pins through the holes in the activation plate. On in, test the motion, mark the depth of insertion, and when ready glue into place. If you intend to use CA glue, use the slow setting stuff and be very careful not to slosh it around and freeze the internal mechanism. Keep moving the wings until you are sure the glue is set. It will not take much to hold the wings in place. Hope this helps! If not send me a note.
Al
0 Comments
Things are still under construction but I thought I might introduce a few of the characters of my current automata project about a dental office.
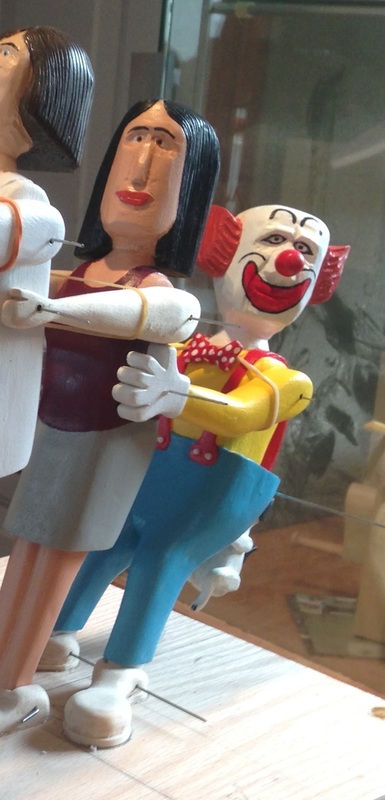
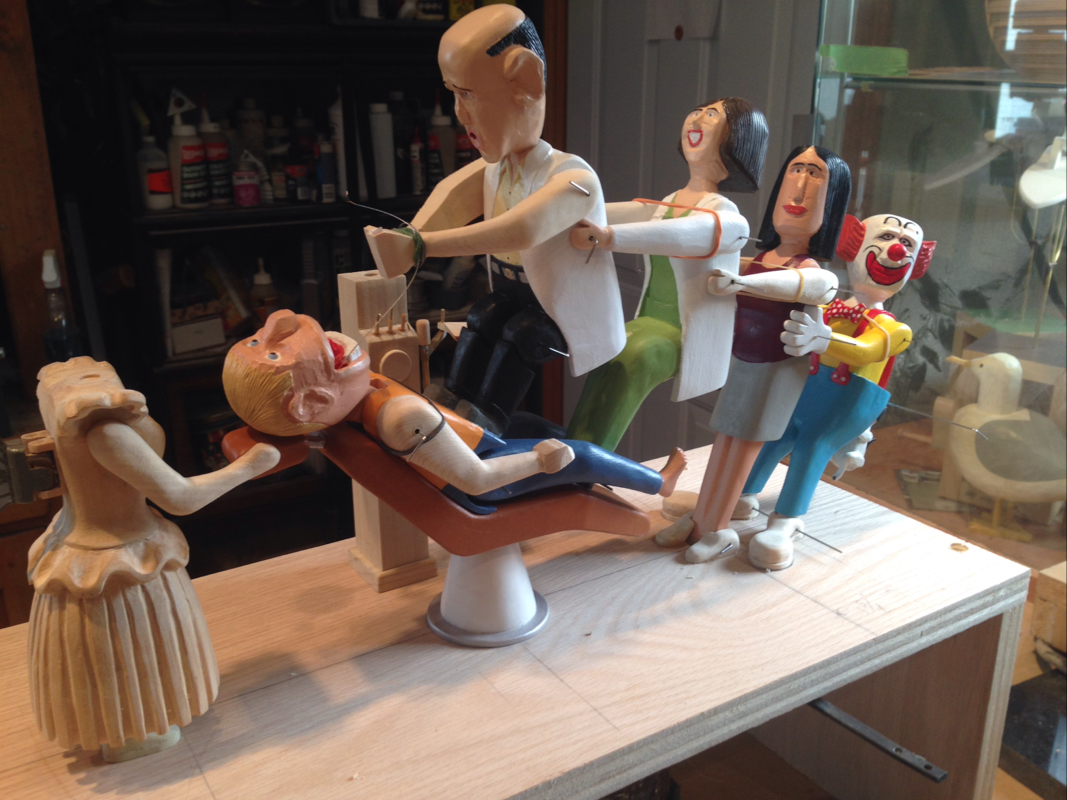
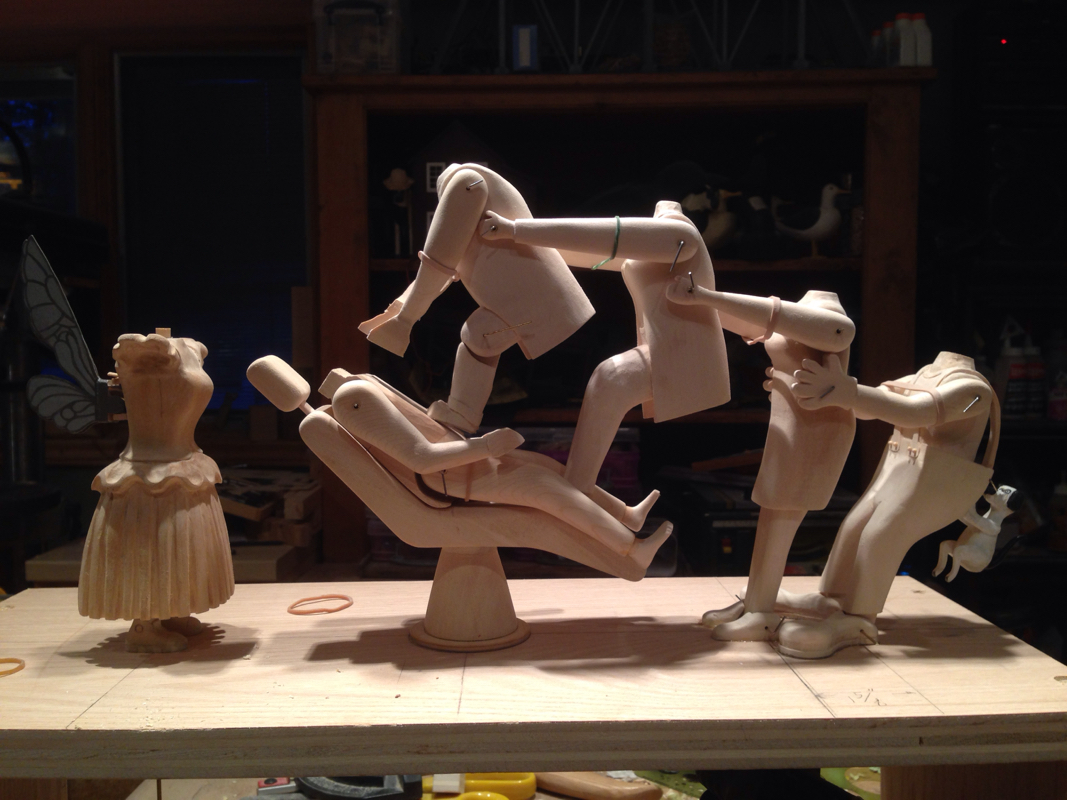
This is Molar the clown. He just happened into the dentist's office when Willy was getting his tooth pulled. For some reason he decided he needed to assist in applying a little more pull to the project. I suspect that getting his hands on the hips of Lima, the woman ahead of him, had more to do with it than the satisfaction of doing a good deed. There is something about the look on his face that is suspiciously sadistic to me! His mind seems to be somewhere else. Of course wherever Molar goes his faithful little dog Bicuspid follows. A bright little fellow he's figured out the problem and has added his weight to the solution by hanging off the back of Molar's oversized pants. Well heads are getting done and paint is being applied! The dental dilemma looks like this today! A bit more work on the characters and a little paint and its mechanism time. I spent an enjoyable morning today with Eldon Humphries, a local member of the Caricature Carvers of America, a collection of notable caricature carvers developing some new skills that I hope to bring to my automata characters. Thanks for the guidance Eldon!
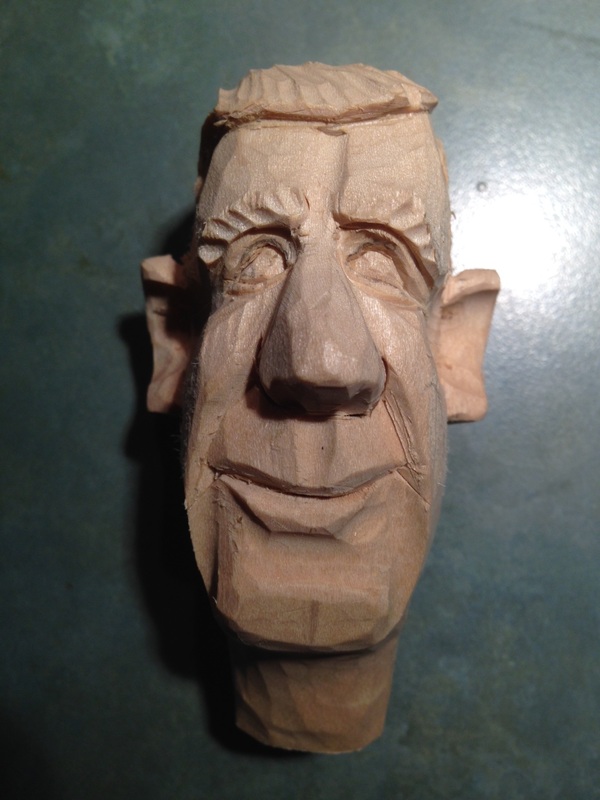
Here's a head I made this morning under Eldon's watchful eye. I'm anxious to get going on heads for my current piece. As I was working along, I decided that the current project needed a little environmental character added to it. I decided to add some dental paraphernalia so I went "web surfing" to see what images I could find. Hidden among all the high tech shiny stuff I found some photos of some older equipment. Remember the drills with cables and swivels?
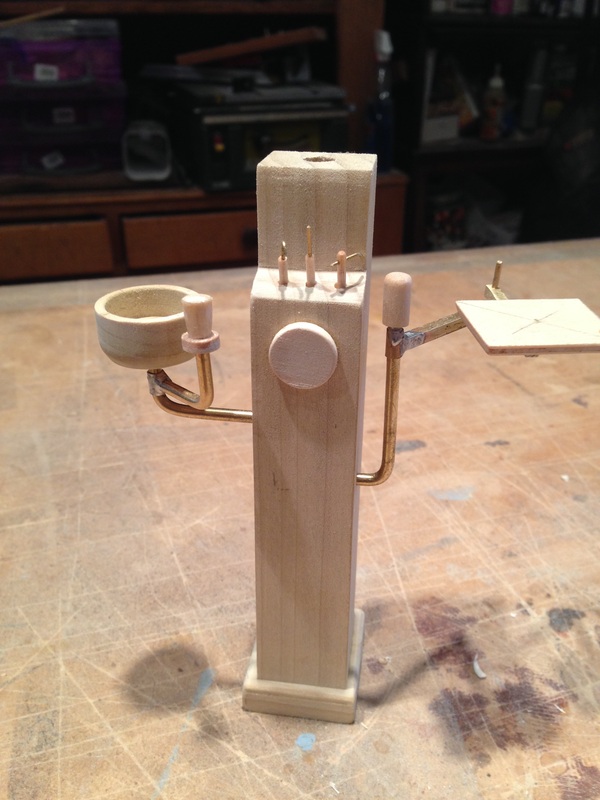
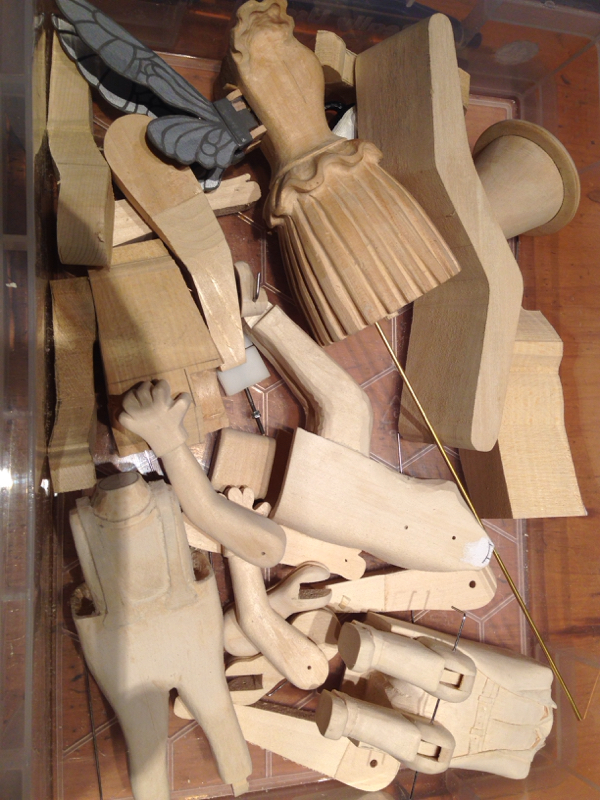
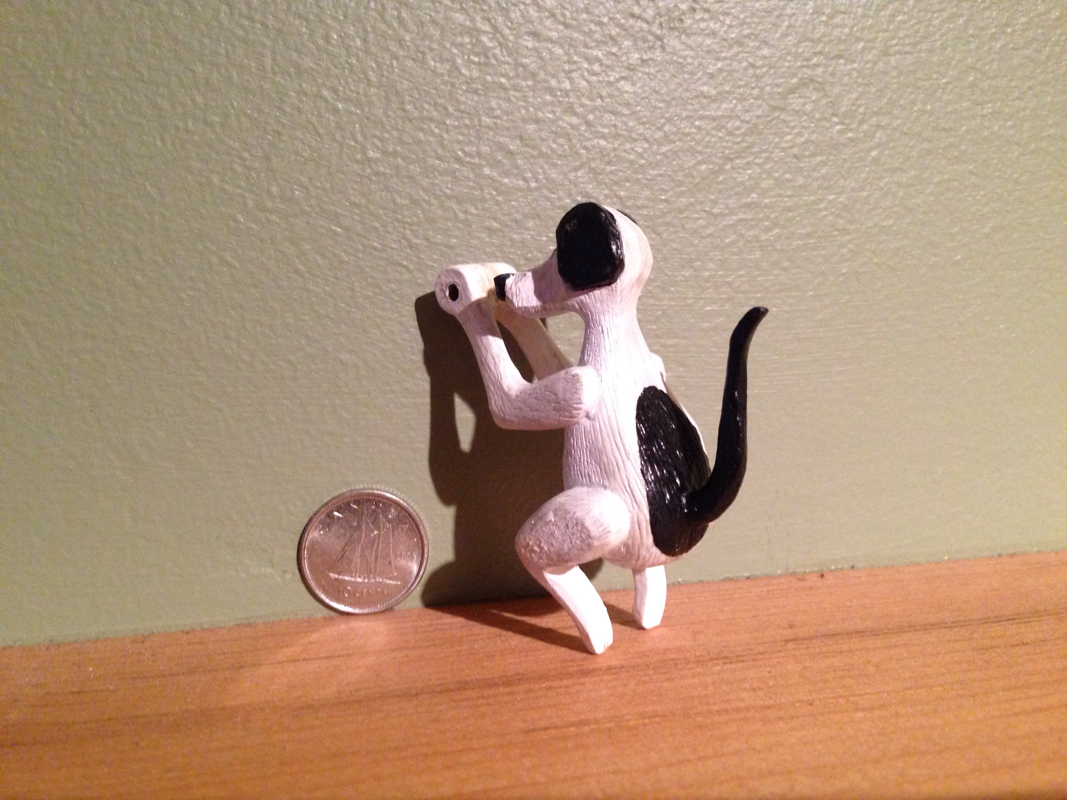
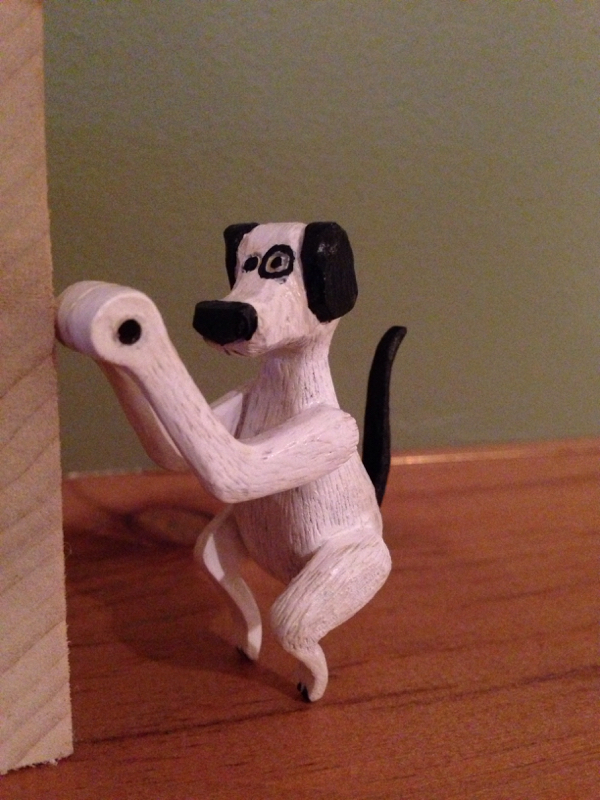
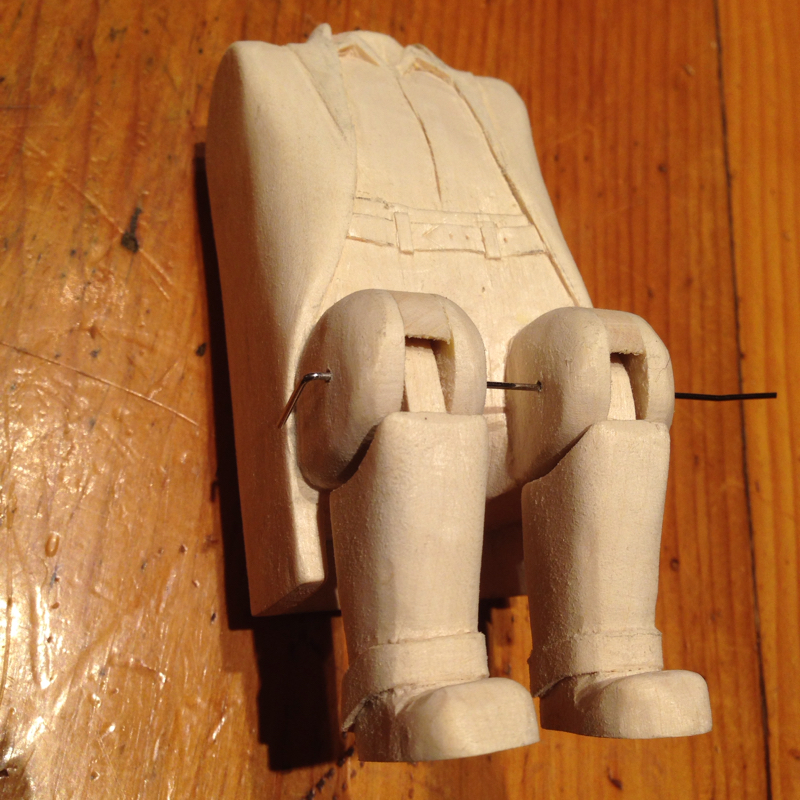
Anyway I chose a few images and set out to customize my own design. I always try to balance what looks authentic with what is practical. So here is my dental pedestal under construction. The spit sink is still a little crooked. The hole in the top is for the overhead lamp, that will turn during operation of the piece. I'll add a few more knobs on the top in front of the light stand. The swivel pin behind the tray on the right will be cut back and the tray fixed in place. I'll also fake a few tools on the tray. The drill motor would normally be on the post on the right but i'm going to leave it out. Too finicky! After all it is not the main attraction and well hidden by the characters. The characters of my latest automata are beginning to emerge, although still headless. Today I was doing a temporary glue-up to check the movement range and possible interferences before finishing details on the characters. The dentist needs a handful of tools and the fairy will get arms tomorrow. Churning away in the wood chips making people. Here is the current batch of body parts. You might find pieces of a dental chair, a fairy, a dog, a clown, a patient and a couple of hygienists. Gotta keep cutting! This little dog "Bullseye" is the last one in the chain of folks who are helping the dentist pull a stubborn tooth. He is the clowns constant companion and always gets in on most everything. In this case he will provide ballast, hanging off the backside of the clown. He is shown with a dime to give you an idea of size. Spent some time in the shop today. After a minor cleanup I started working on the dentist that is in my current project. He is headless at this point. His arms are separate since they will move. The long pin through the knees is temporary. Two separate pins will be used later, one for each leg. A milestone for me today is that one of my automata took up permanent residence in Marvin's Marvellous Mechanical Museum in Farmington Hills in Michigan, USA! Now I get to drop that I am an internationally renowned automatist, ... as if! Anyway I have mentioned before Marvin Yagoda is a colourful character, running a colourful business. As a collector of automata he has numerous pieces on display in his museum from around the world. If you are ever in the neighbourhood, do stop in.
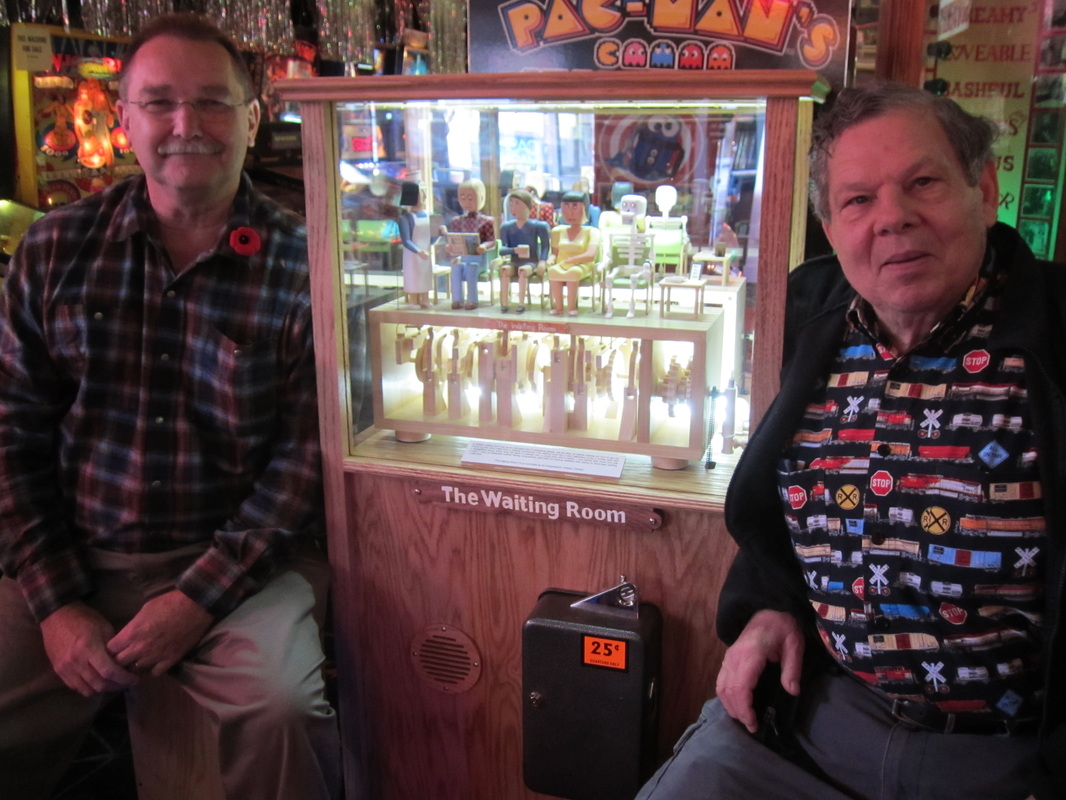
Here's Marvin and I at the inauguration of "The Waiting Room" into the museum's collection. Visit the museums Facebook page at www.facebook.com/marvinsmarvelousmechanicalmuseum |
Why Automata?Automata is a creative blend of my life interests , engineering, art and woodworking. Archives
July 2022
Categories
All
|
 RSS Feed