|
When people look at my finished work, usually a more complex one, they always ask, "How long does it take to make that?" In a instance like the current project the answer is, "It depends!" School's Out could have been built with simple fish. The mouths could be fixed and the bodies could be made with a smooth surface - no scales. The scales add an artistic touch but add a lot of time to the project, not only in making the scales but in the added complexity of painting. I have attached a short video to show part of the process of burning on the scales. Each fish takes about an hour to complete the scale and fin markings. Add an extra 15 minutes over a simple paint job for the extra wash coat to penetrate the voids and you have just added 12-1/2 hours to the project due to the wood burning detailing. Hopefully most viewers would think it is worth it! Somehow having the fish looking fairly realistic adds to the serenity of the piece. To put more detail into it, I would feel I should be making a fish carving, not an automata. For me when making characters it's always about finding a satisfying balance - not too simple, but not too exact.
0 Comments
Here'a a quick video clip of the unpainted fish in motion! They have been painted since. Temporary jaw pins are still in place. It took a little doing and some usual audio visual hiccups but finally the video for the recently completed automata piece "Fishing is posted on the Fishing page of my website. Please have a look and tell me what you think! Gertrude and Heathcliff are waiting for your visit! 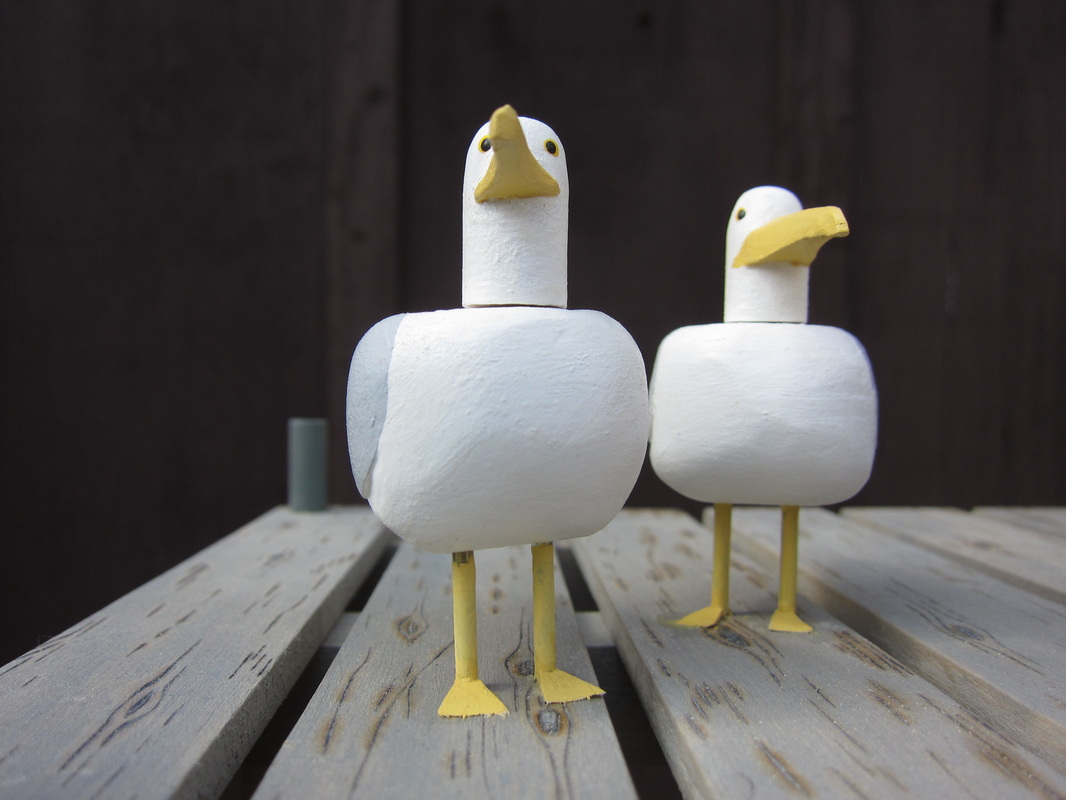
Any french fries around? Mine! Mine! Mine!
I selected a handle design and set in to build it today. The result is a muskellunge, Mishe-Nahma, whose name is taken from the song of Hiawatha. Here is the finished photo. Tomorrow it will get glued on to the input shaft and the Fishing automata will be virtually complete. 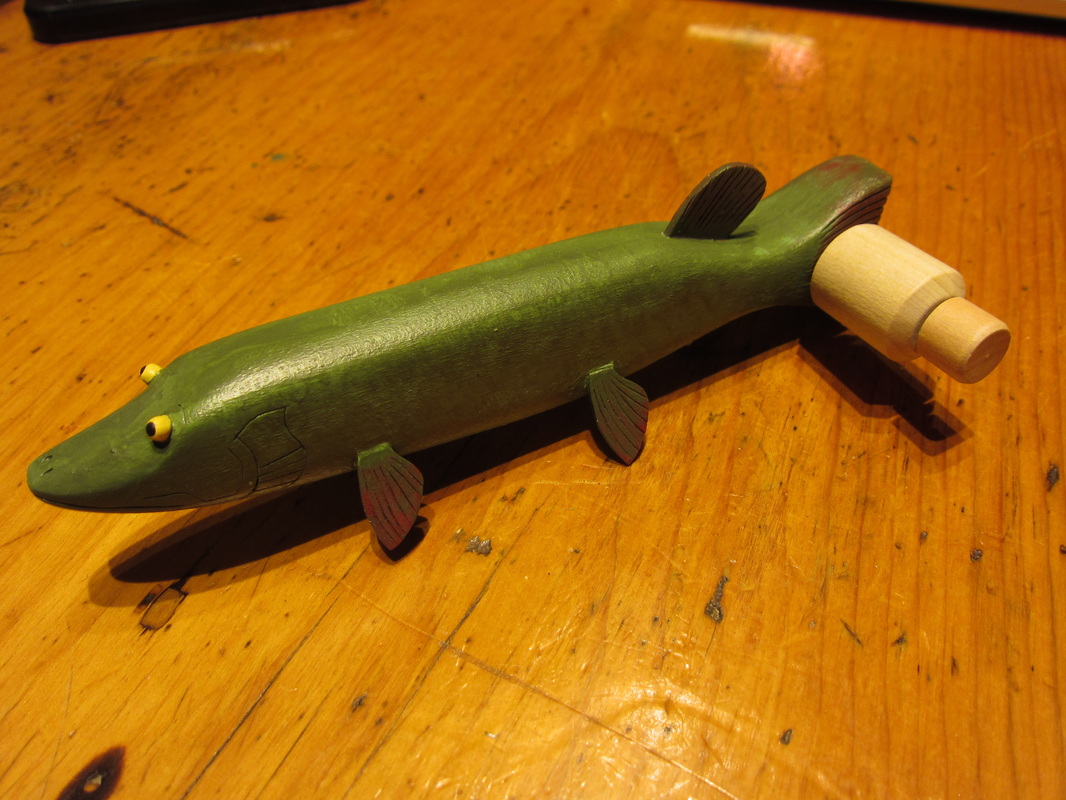
Given a little hole, sometimes you just have to fill it! I decided to add another leviathan under the dock of the current automata construction. This time I chose to add a catfish. He will not move in an out like the other fish I have made, but will lurk under the dock opening and closing his mouth. He is about 4 " long, 3/4" tall in the body and 1-1/4" wide. I started with a piece of basswood and cut, carved, and sanded the shape as shown below. The smaller piece in the photo is the lower jaw. 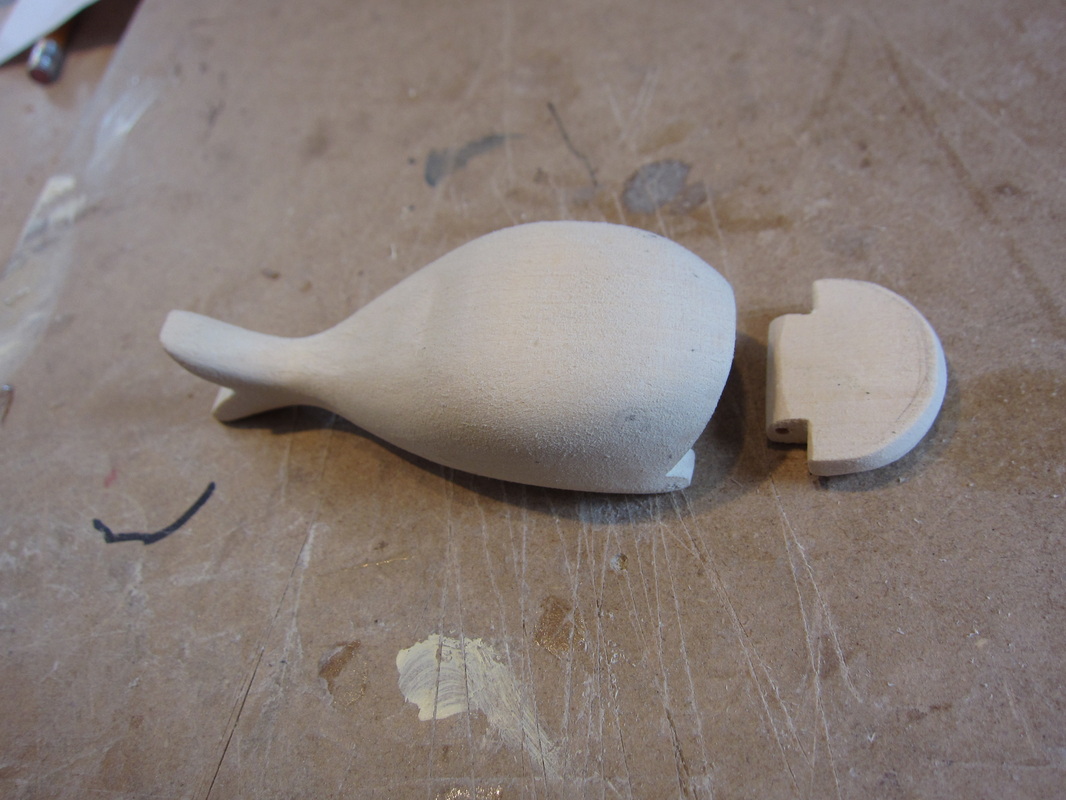
In order to actuate the lower jaw I am using a 1/16" brass rod running up from behind inside the catfish. I placed a 1/8" hollow tube so it would slide easily. In the photo below you can see through the fish's mouth into a 1/4" hole and eventually into the tube. The 1/4" hole is to allow some freedom of movement for the brass rod. The mouth of the fish was hollowed out with a carbide bit on a Dremel tool. 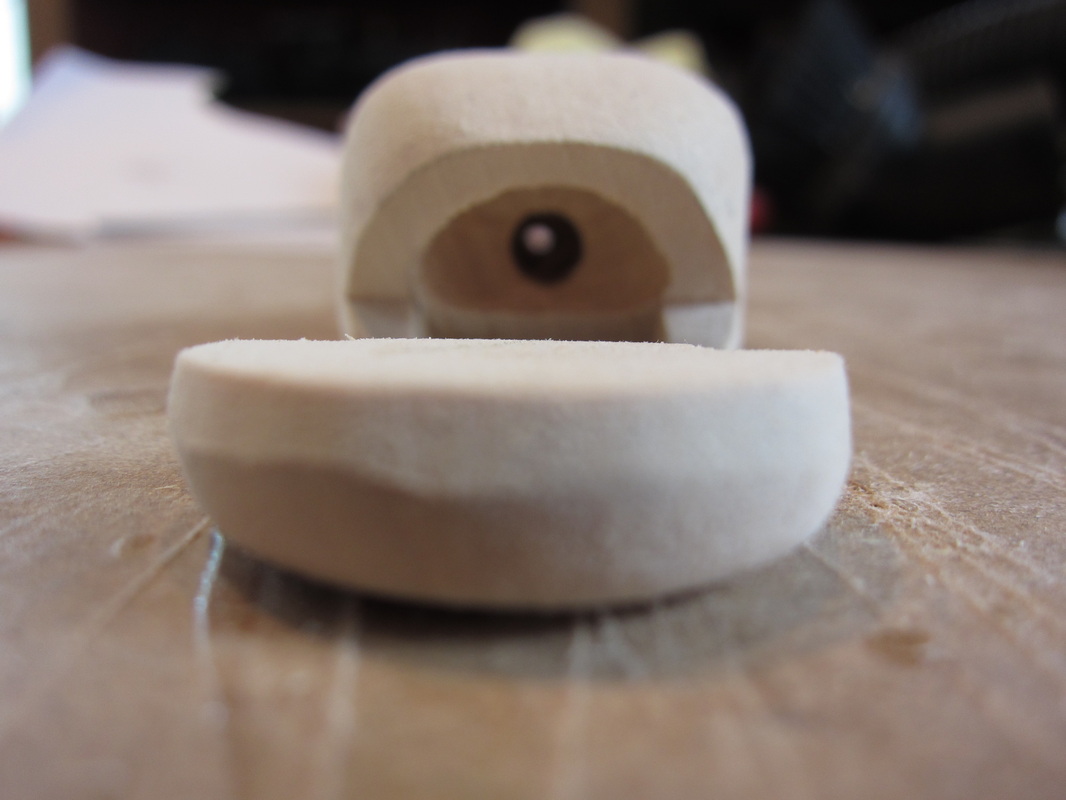
Whiskers were added using 3/32" brass rod. In these photos they have not been cut to finished length. Fins have been added but I have yet to use my wood burner to add detail to them. I wanted the catfish to look a little "scary" when I designed him, but somehow he ended up looking a little like a Grouper in serious need of a shave. The good thing about automata is that you can always say that this fish was meant to be whimsical in the first place. He is mounted on a block which will secure him to the automata case. 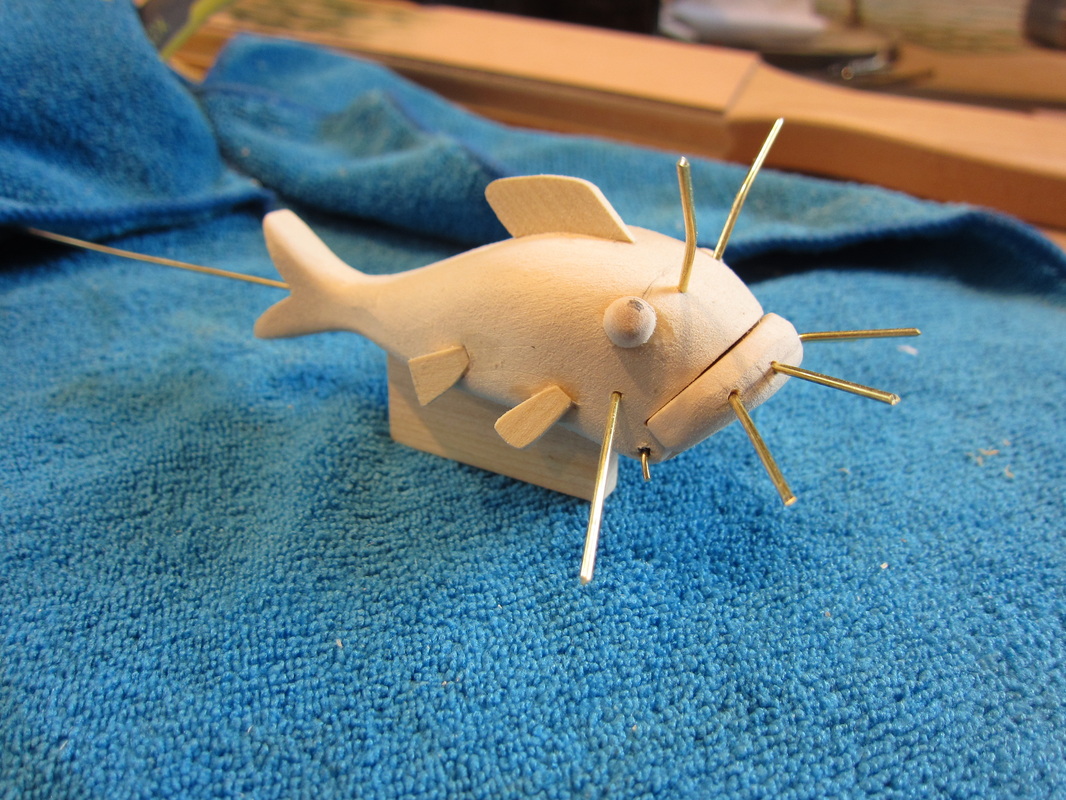
A new feature of my web provider is that I can now add short video segments into the blog, so I added 6 seconds of video showing the catfish in operation to try it out. Till next time. I still have some followup to the head construction to come.
Al Took a break for a few days from automata work this week. I was working on a kitchen renovation at my daughter's house. That done it was back to the computer to finish up the design and drawing of the current project. People often ask how I come up with the design and all the little pieces. Some think when they see a finished piece it must of come in a kit! I consider this a sad reflection on todays consumerism standards. Even worse it might suggest that I look to dense to have figured it out myself! So here is a view of the CAD design of the current automata - yet to be finished! On the upper right you might be able to make out the chocolate Labrador featured previously on my blog. Over on the left you may also see one of two seagulls also featured in the blog and somewhere hidden in the mechanism is a wireframe of the bass that was posted. While tedious at times 3D CAD drawing it is a good way to avoid interferences and create patterns for complex shapes. Well back to the drawing board, or at least LCD screen for a bit and then some time in the shop to make changes to the working prototype. Al 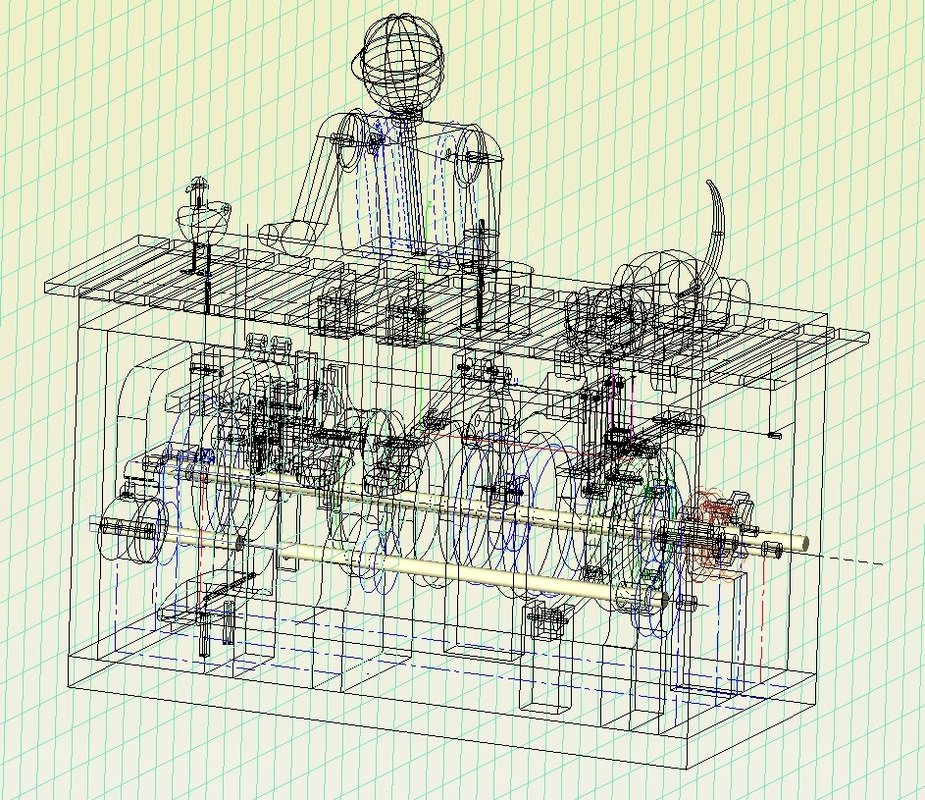
Well the little leviathan got a some colour this morning. He now looks more like a fish should. His eyes were left "bug eyed" show that their movement would be more evident. His jaw pin was installed and plugs put in and sanded prior to painting. They were still visible in the last photo. My intention with a component like this is to look somewhat real, perhaps a whimsical, and portioned to facilitate the planned movement. Tail fin to nose he is 4-3/4" long. 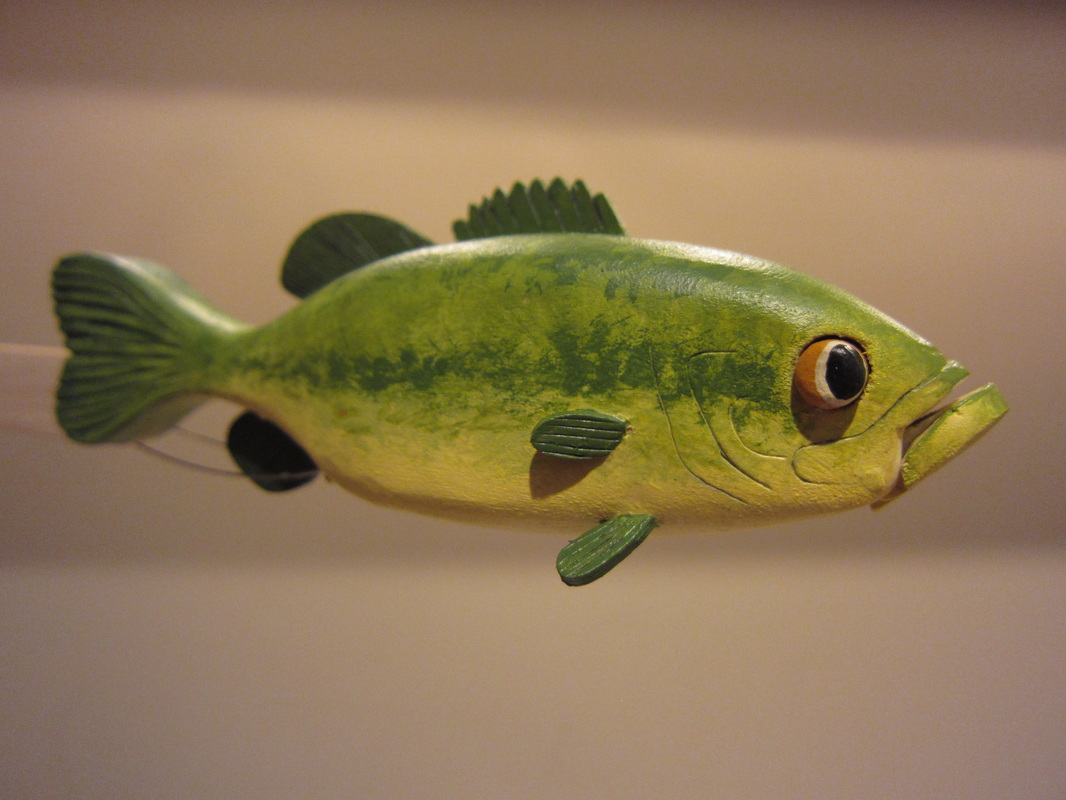
I added the four additional pectoral fins to the fish and added a little ribbing detail on all the fins and defined the gill plates with a wood burning tool. 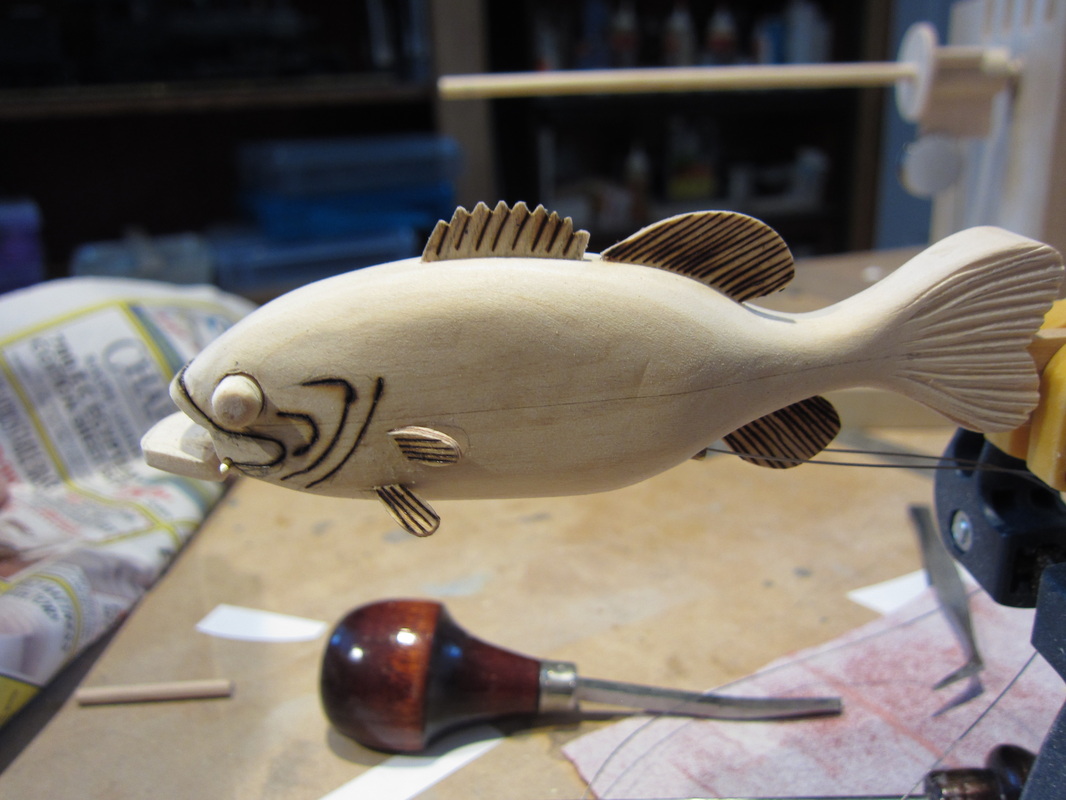
A little finish sanding and touch up and onto painting.
The current automata project has a large Bass lurking under the dock where a boy is fishing. He will periodically poke out his head and as he does his mouth will close and eyes will roll. Large is relative of course, he is just over 4" long. 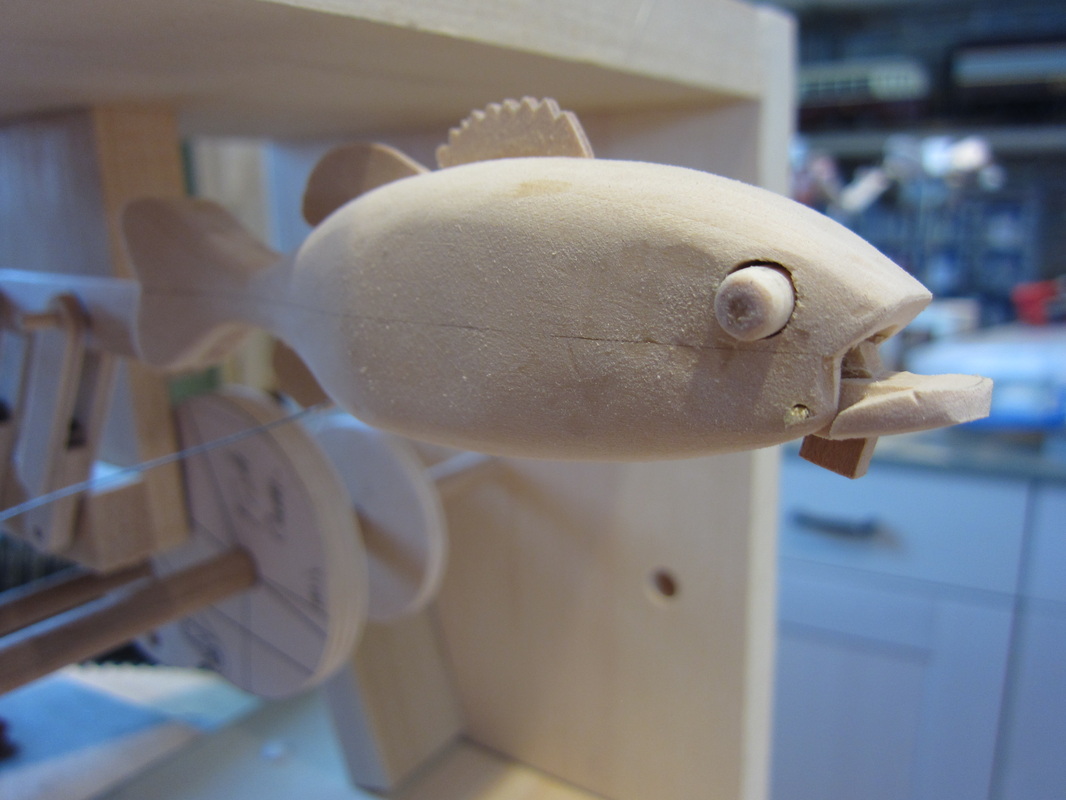
The little block on his chin is to limit how far his mouth falls open and has been cut down substantially so it is not noticeable. There are two cables that operate the eyes and mouth. One of them (for the eyes) can be seen in the photo near the bottom rear. The actuator for the eyes had to be assembled in the fish as it was made. As shown below the blank was sliced in half horizontally and a brass lever, weighted with solder was installed. The eyes are drilled out dowels slipped onto brass pins and were shaped into eyes after reassembly of the body and final carving. There are small brass tubes through the rear of the fish so the cables operate smoothly. Three fins are made from 1/16" ply and added later. The two dorsal fins can be easily seen above. There are still two pectoral fins to be added when the above photo was taken. I'll repost after he is painted. 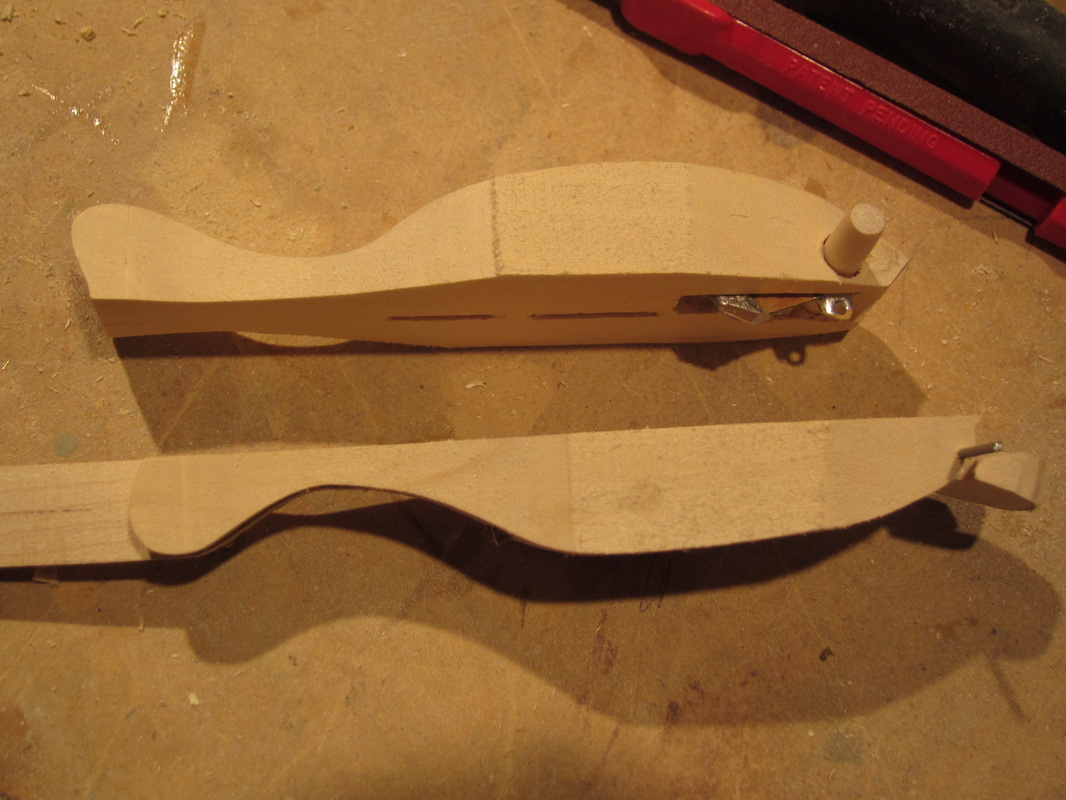
What's a dock without a seagull? The answer. Not so realistic. So having designed a gull this week I am off to see if I can make it all come together in the shop this weekend. The challenge is that the seagulls, yes multiples, will only be 2" tall and seeing that it is an automata they must move. (Al's rule... if it's gonna be a part, impart some motion!).
I have settled for a fairly simple turn of the head, but I want to hide the mechanism from sight. Therefore the design has the activation rod coming up inside one of the legs. I will use a 1/16" rod through a hollow brass tube acting as a leg, at least that is the plan. His legs might be a bit chunky, but things are allowed to be whimsical. I will cut and hollow out the body for the linkages and glue it together before final finishing. Who knows if I can make my fat fingers do this, I might try a moving beak! (That was typed with unbridled optimism. I may have to eat crow, or maybe even gull on that one.) If it doesn't work... well, at least I will know my limit. I'll take some photos along the way for posting! |
Why Automata?Automata is a creative blend of my life interests , engineering, art and woodworking. Archives
July 2022
Categories
All
|
 RSS Feed