|
After completing the "I'm Thinking" automata, I made a few revisions and created a second design in a project called "Laura". I changed the hair cut to make it easier to finish around the neck, moved a few gear shaft locations to make things run smoother, enlarged the centre disk, and made slight changes in the brain portal. So here is "Laura", modelled after my daughter, and yes she is a blond!
1 Comment
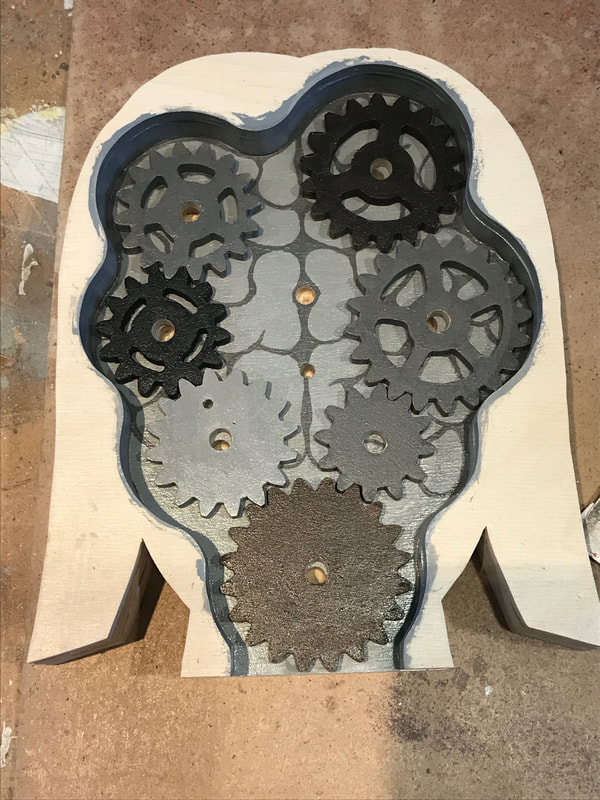
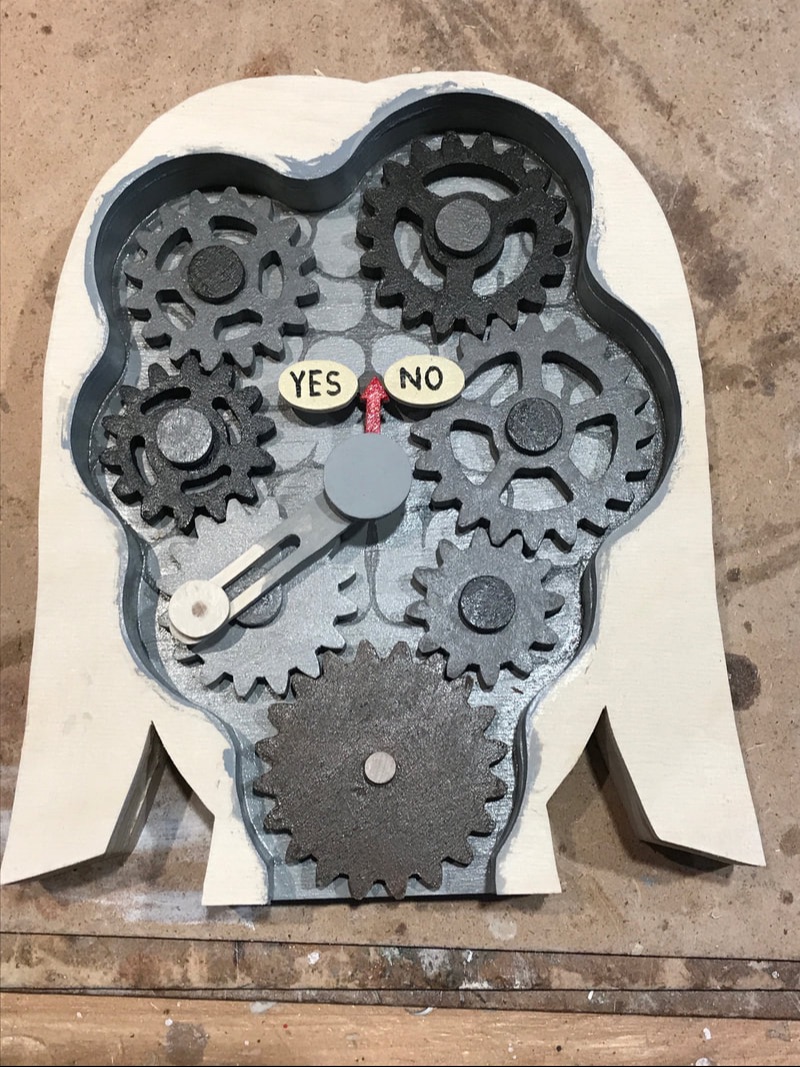
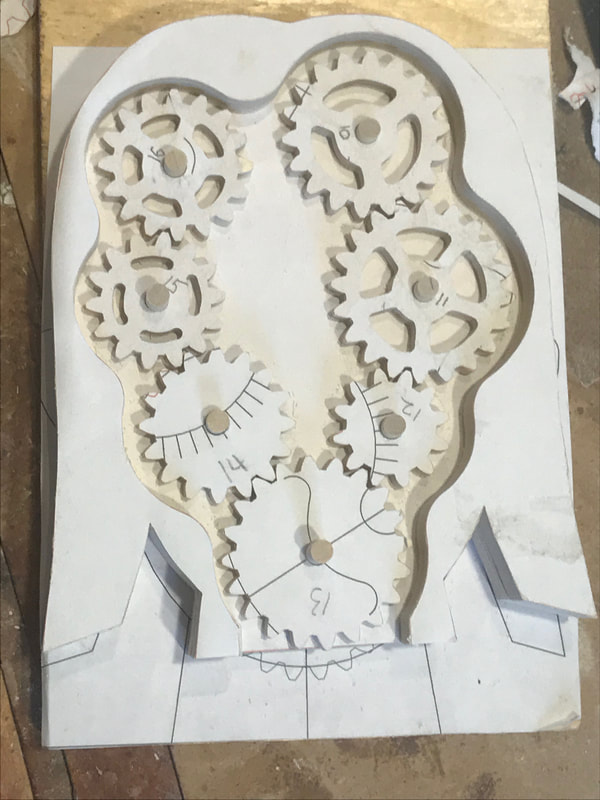
Here is the "I'm Thinking" automata I just completed. In previous blog posts it was referred to as "She's Thinking", but I thought a more asexual designation would be appropriate. It is just a matter of changing the haircut a little. It's about 10" tall and 7" wide. You can use it like the infamous Magic 8 Ball by having viewers ask a question while I turn the crank without looking at the pointer. Where I stop it, they get heir answer! Hope you enjoy it. So I day goes by and I've added some colour to my have constructed project. I was anxious to see how the gears would look in the finished environment. This piece is built in two halves so I am plying along focusing on one half at a time. So it may be evident to you now that these gears are inside someone's head; in fact in the their brain. The lobes are hiding behind the gears. A day later and the gears are installed, and an alternating pointer is added to oscillate between a YES and NO sign in the centre of the arrangement. The disks on the end of the dowels are the retainers that keep the gears on the shafts. I'll talk about how I made them and why I designed them the way that I did in a subsequent blog.
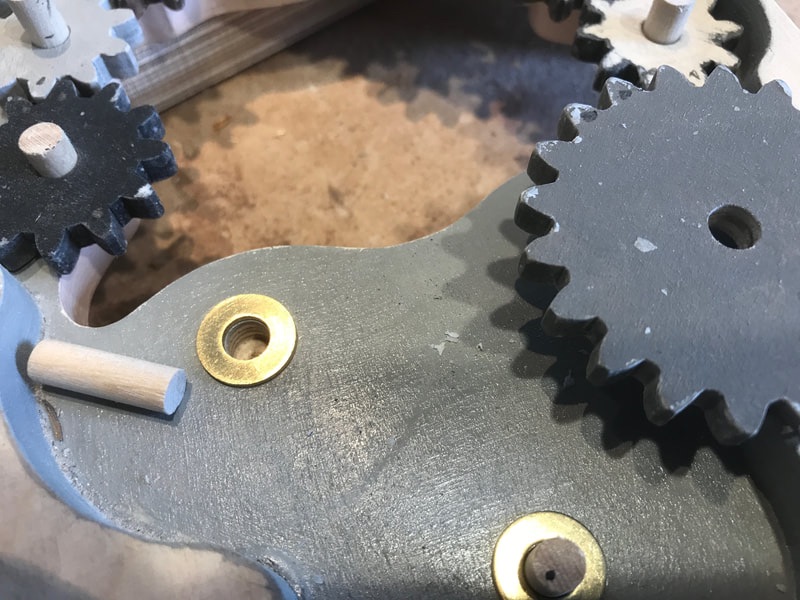
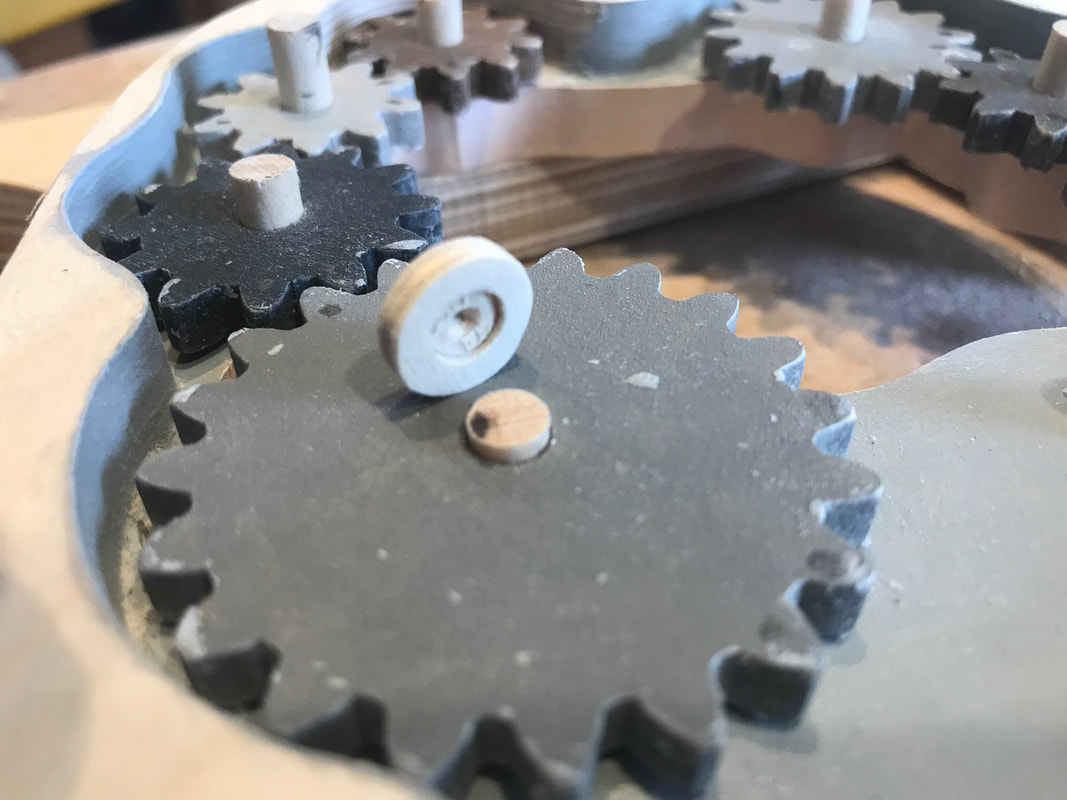
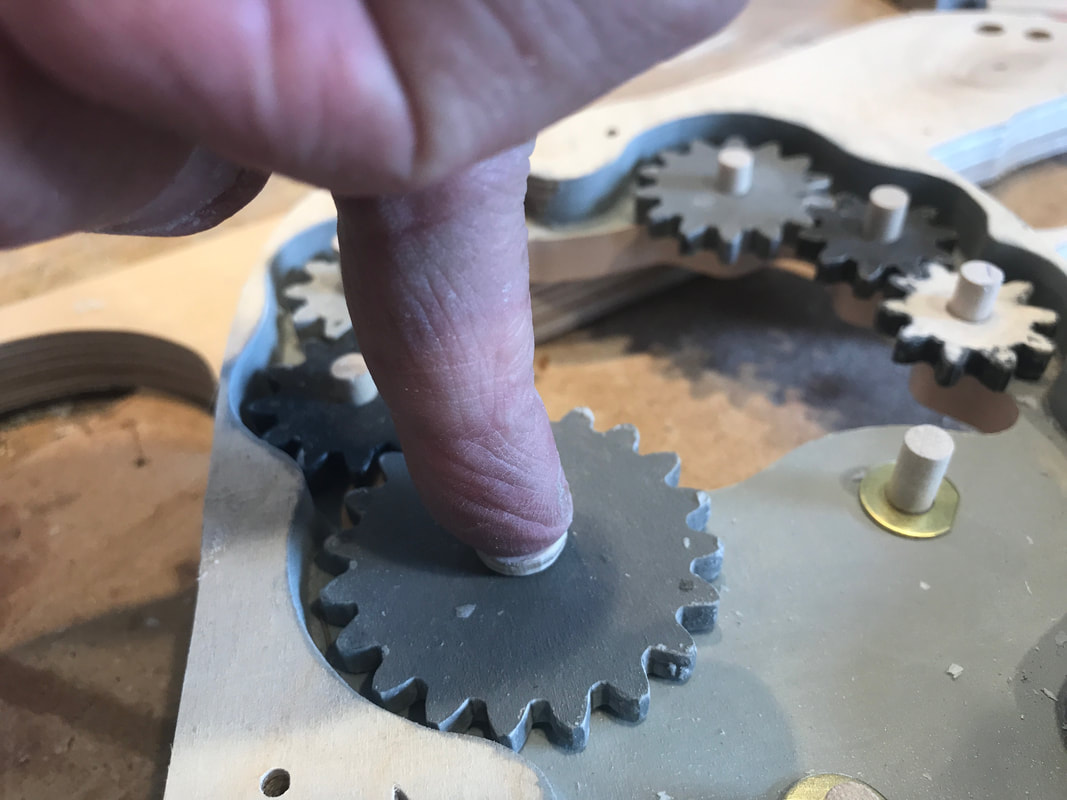
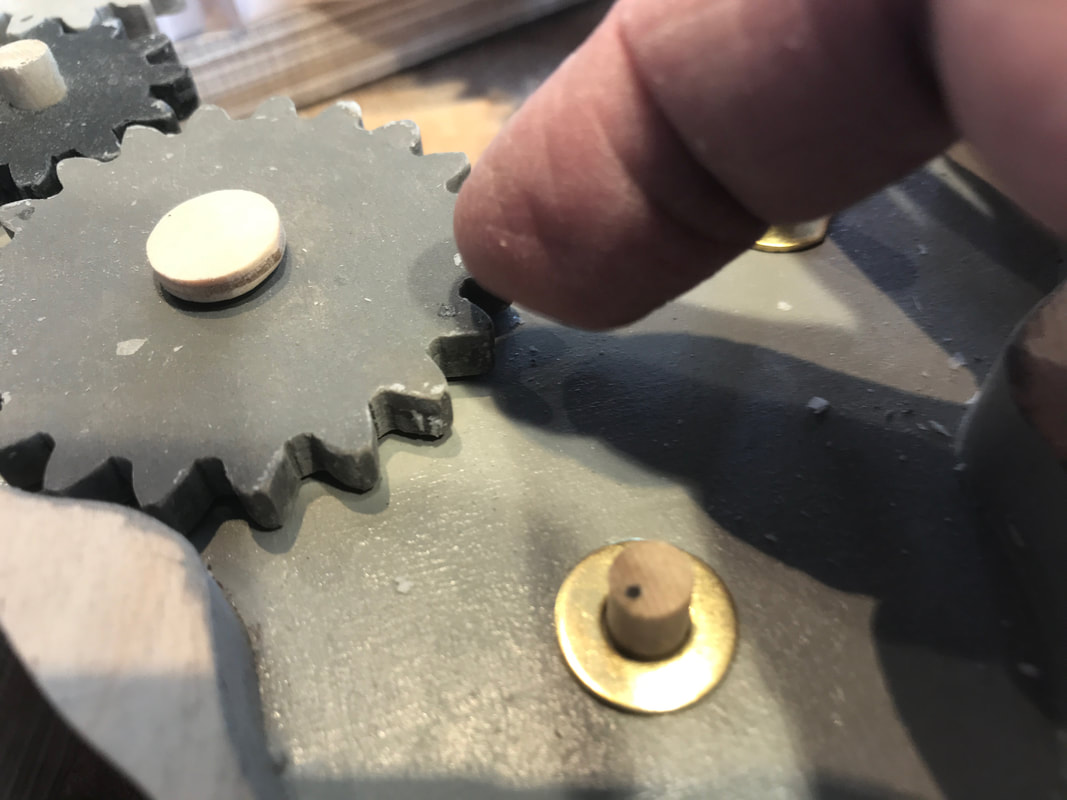
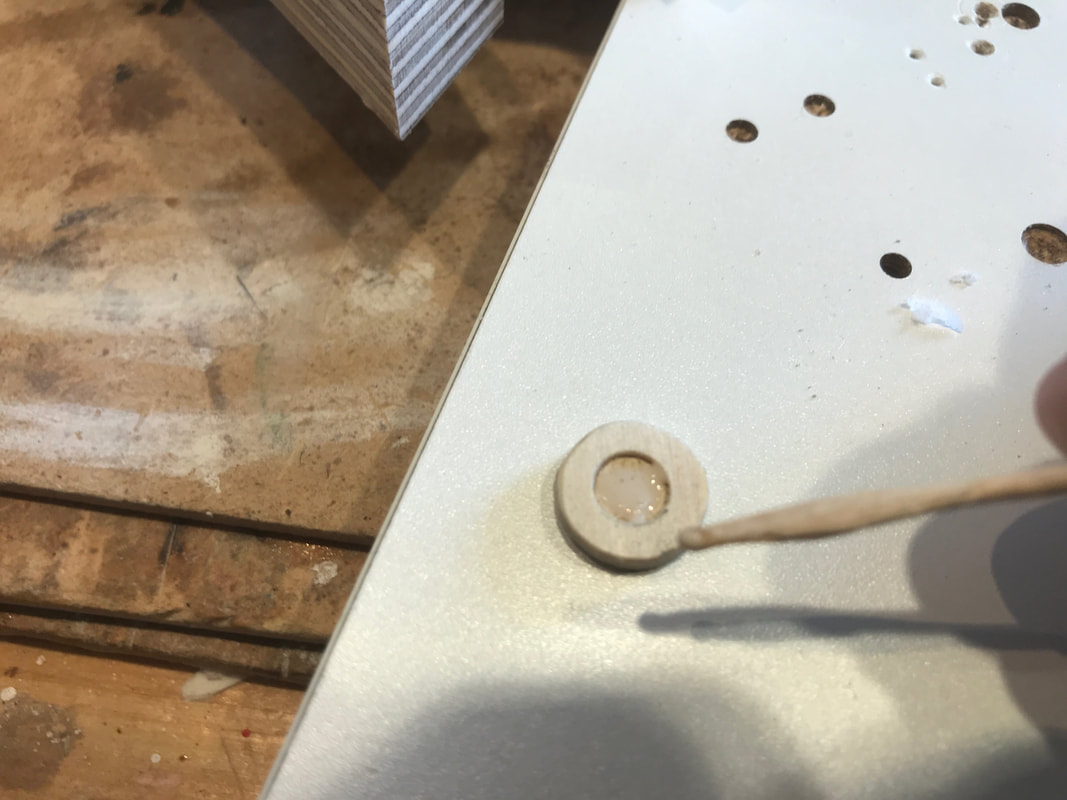
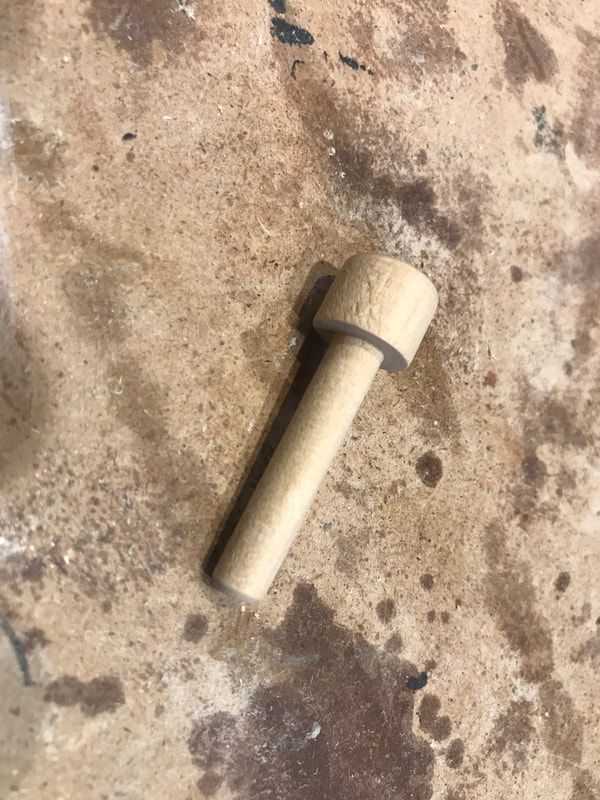
In the end there was a fair bit of fitting to make the gears to run smoothly. Being so small, locating the centre holes is key. I had to make a couple of new gears as the originals were not precisely in the centres and they interfered with each other. Even the addition of paint created some issues as I believe the water based paint caused rough grain surfaces to interfere slightly as the paint dried and I had to hand sand the profiles to get a good running system. It all took a little longer than I though to get all this done. Ah well! More to come! This latest project has some gears mounted on pins protruding from a flat surface. Their are a couple of ways to do this. I use the same configuration when I mount a pin into a surface for a reversing pawl arm. The critical action of these two applications makes them a little different. The gears are more sensitive. Let me show how I did the gears in the first section assembled shown in the last few blog posts. It starts with a 1/4" hole drilled into the backplate of the head. It is about 3/8" deep in a 1/2" thickness sheet of birch plywood. Next you can see a brass washer placed over the hole. It is not glued to any surface. The washer is a spacer that keeps the gears from rubbing on the back plate. For larger gears I usually make a larger wood disc for this purpose. A length of 1/4" dowel lies ready to be used. Next I put the dowel pin in the hole, place the washer over it and slide the gear onto the protruding shaft. (See photo below.) I mark the top level of the gear with a pencil . Sitting on the gear you can see a top cap made of 1/8" thick birch plywood. It has a very shallow hole, 1/4" in diameter, made with a forsner bit, just enough to settle on to the end of a 1/4" dowel. I remove the dowel and cut it so a little less than 1/8" protrudes and put it back in. Place the cap on top. Push down on the cap to make sure the pin is bottomed out and the cap is entered on the dowel. Observe the gap under the cap, and spin the gear. If it rotates nicely, you are good to glue. If the gear binds cut a new dowel and start again. If the gap under the gap is too large, remove the dowel, sand down the length a little and try again. When you are happy it is time to glue it together. Remove all the pieces and start by rubbing a little wax on the dowel at the gear end for lubrication then put a little glue on one end of the dowel and a little up the side. Push it into the hole tightly. Remove any excess and then put the washer on, and then install the gear. Excess glue could freeze the gear in place! I recommend not using CA glue for these process. Using a toothpick put a little cabinet makers glue inside the cap hole, not too much, if the glue squirts out onto the gear it will possibly freeze it in place. The hole left by the drill bit centre should leave some space for the excess to go. Spin the gear again as a double check. If things are ok, let it dry. I use this technique in circumstances like this because I feel it gives me better control of the fitting and safer application of the glue. Conversely you can use a peg like the one shown below. These are usually available in the toy parts section of your local woodworking store. I often sand the head height down on these when using them. While you can still test fit things, when you apply glue on the backplate hole the operation is blind so the right amount of glue is important. Also the heads on these pegs tend to be smaller in diameter so I would usually add another washer under the head and wax the surfaces.
The manufacturing tolerances on these things are not great sometimes so they can be tricky to get square when assembling as a whole assembly. and pulling things apart again is not right can be tough. Either method can work if you are careful. I prefer to use the first method for tighter control. Have fun either way! I was binge watching a bunch of Amazon Prime animated shorts the other day when a brief image in one of them caught my eye. I thought about for a day or two and then went back to view it again. I thought to myself I could could apply this concept to make an interesting automata. So I took a break from my casserole factory and set into this simpler automata design. It would require a fair number of gears and I always find making gears a little therapeutic. Here is a photo of the first steps of construction. For now I'm calling it "She's Thinking". The dowels at the centre of the gears are 1/4" in diameter with the whole segment being about 9" high. These gears are smaller than the ones I usually make. They are 8mm pitch. The largest gears are a little over 2" in diameter. Things should become clearer in a few days. The piece is almost finished. I am just getting caught up on my blogging.
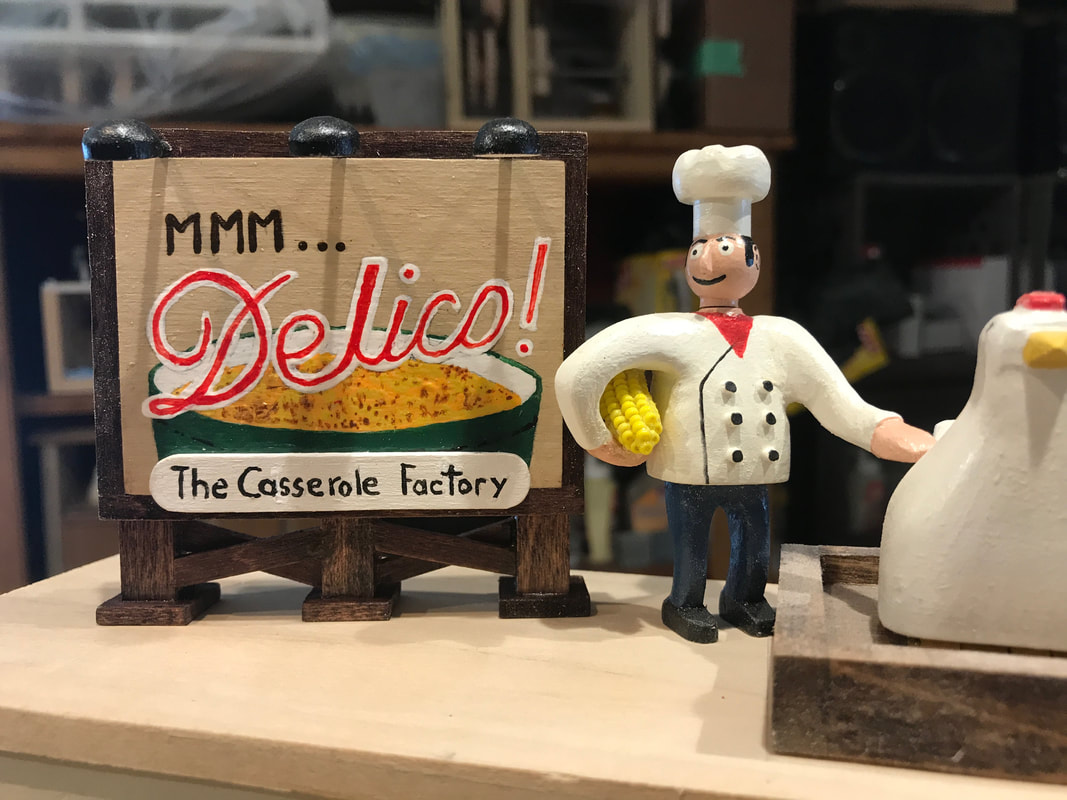
The Casserole Factory gets a new rooftop billboard! The owner is a bit of a traditionalist so he opted for a "retro" look to honour the vintage of the Factory's flagship product. The Delico recipe sprung out of a United Church of Canada fundraising cookbook authored by members of the women's auxiliary in London Ontario in 1959.
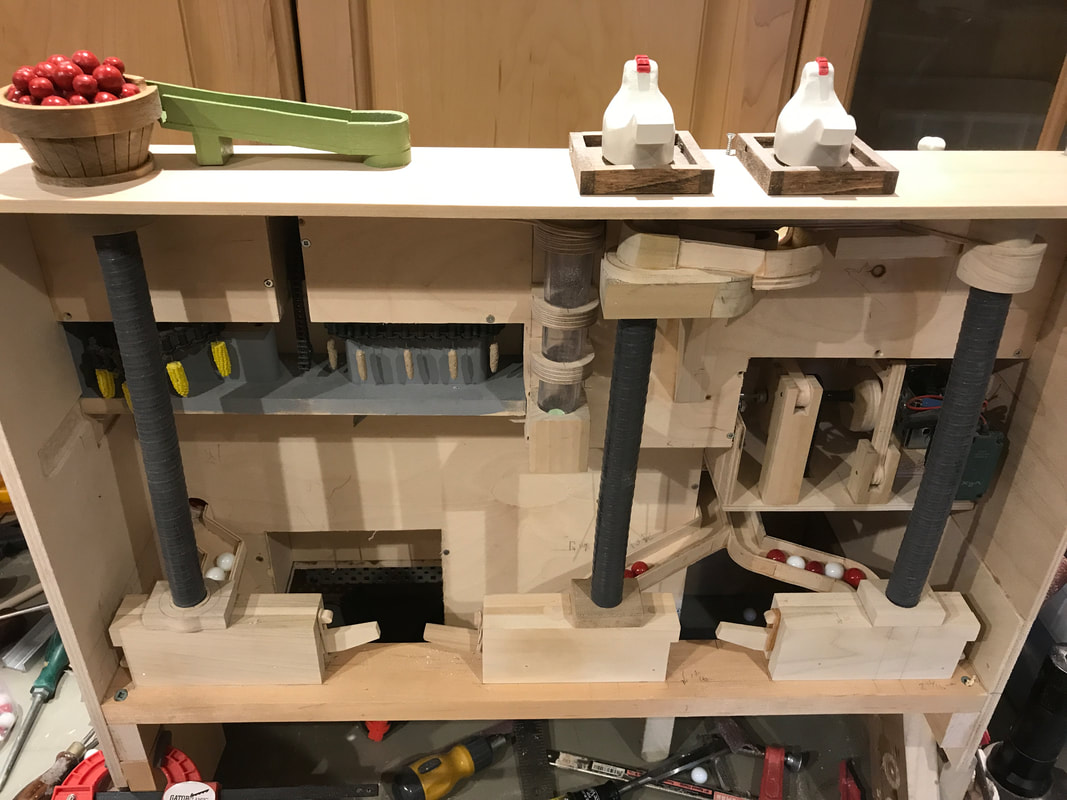
Anyway it sits high upon the roof looking very much like an advertisement of the period. Well this particular feature of the current automata project has been a labour of love that has seemed to last an eternity. Maybe I will scare myself and add up all the number of pieces it took to slap together the three marble runs for the Casserole Factory! There are two egg runs and one tomato run. I had spent a lot of time putting together the front side but a lot of this week went into the backside. Making marble pumps and runs on the backside. Here is a photo of the rear as it stands today. Across the bottom of the photo are three marble pumps. You can see the three channels that collect marbles from the front and direct them into the pumps on the backside. Right now the marble colours are mixed up, but I will fix that later. By articulating the levers on the pump the marble inside is lifted and another rolls in below it. A pall of the other end holds the column of marbles up. The levers and palls are tensioned by rubber bands but I will likely upgrade them to springs for a longer life.
The marbles rise up inside the grey tubes, pieces of flexible plastic conduit that has an inside diameter that suits the marbles perfectly. Each pump lifts the marble about a foot. The left one spits the red marbles out into the basket on the top and spill into the channel and head off into the factory. The other two spill the marbles into channels that lead them to rollout below each chicken nest box on the front. The pumps will have a rotary cam that will operate the lever up and down to pump the marbles. I want to make them all operate at different speeds so the marble action looks randomly generated front the front. The will likely each pump around 3 or 4 marbles per minute. Hopefully when the white marbles roll out the chicken will bounce as if they just laid it. Of course there is still a lot to do, bakers up on the top deck, gears to drive the corn shucker, a meat conveyor, maybe an employee lunch room, and lots of links! What I did learn that marbles are sold by nominal size, but they are not actually the same size. Some were binding in a couple of spots I made a little tight and I had to make some post build adjustments. The fun never stops! |
Why Automata?Automata is a creative blend of my life interests , engineering, art and woodworking. Archives
July 2022
Categories
All
|
 RSS Feed