|
This latest project has some gears mounted on pins protruding from a flat surface. Their are a couple of ways to do this. I use the same configuration when I mount a pin into a surface for a reversing pawl arm. The critical action of these two applications makes them a little different. The gears are more sensitive. Let me show how I did the gears in the first section assembled shown in the last few blog posts. It starts with a 1/4" hole drilled into the backplate of the head. It is about 3/8" deep in a 1/2" thickness sheet of birch plywood. Next you can see a brass washer placed over the hole. It is not glued to any surface. The washer is a spacer that keeps the gears from rubbing on the back plate. For larger gears I usually make a larger wood disc for this purpose. A length of 1/4" dowel lies ready to be used. 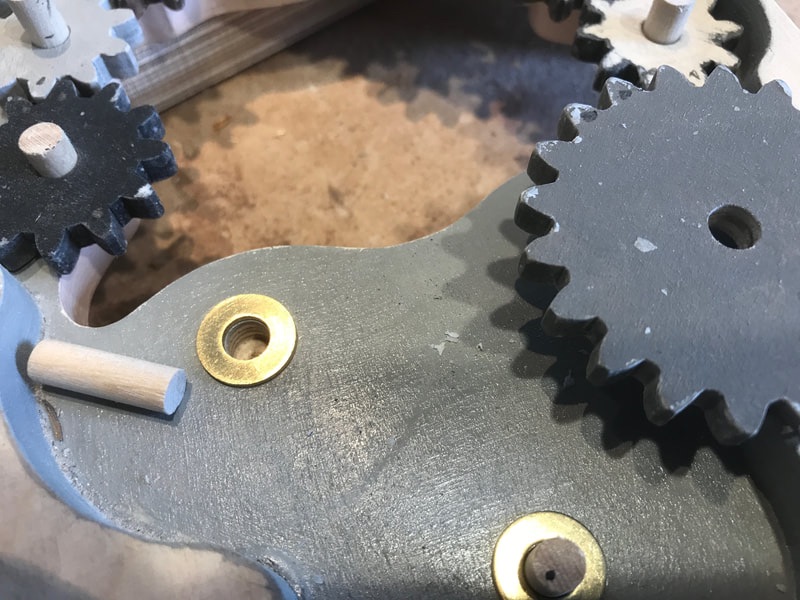 Next I put the dowel pin in the hole, place the washer over it and slide the gear onto the protruding shaft. (See photo below.) I mark the top level of the gear with a pencil . Sitting on the gear you can see a top cap made of 1/8" thick birch plywood. It has a very shallow hole, 1/4" in diameter, made with a forsner bit, just enough to settle on to the end of a 1/4" dowel. I remove the dowel and cut it so a little less than 1/8" protrudes and put it back in. Place the cap on top. 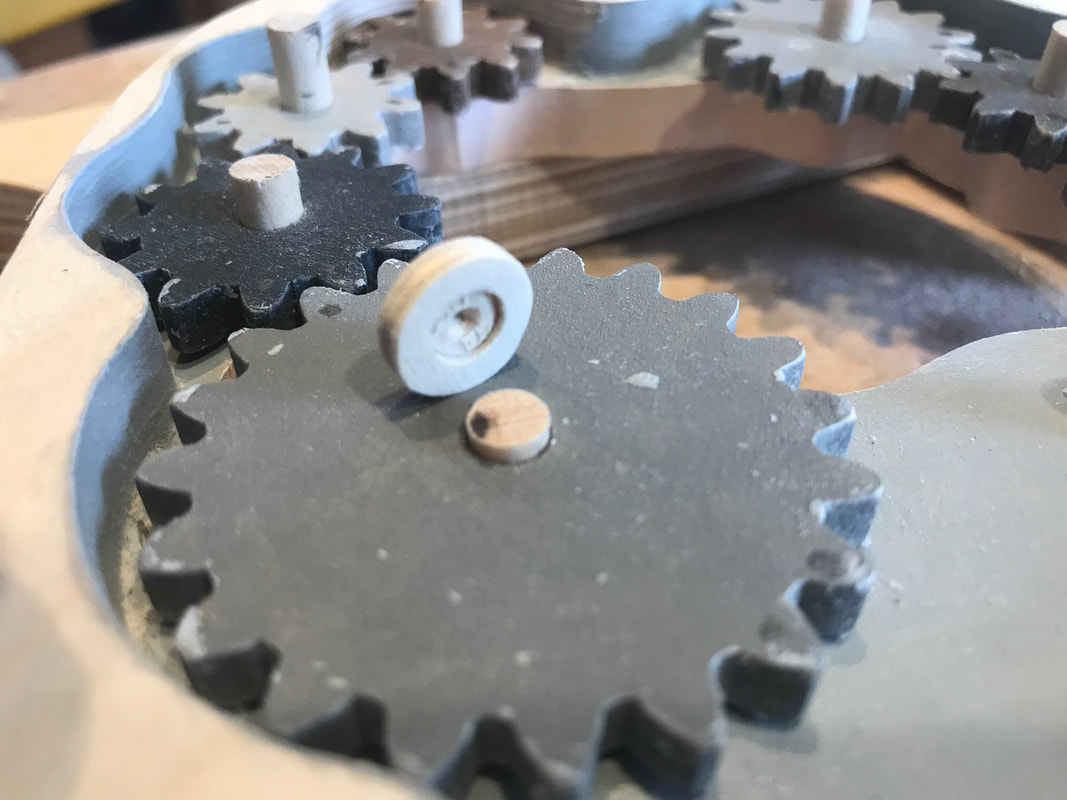 Push down on the cap to make sure the pin is bottomed out and the cap is entered on the dowel. Observe the gap under the cap, and spin the gear. If it rotates nicely, you are good to glue. If the gear binds cut a new dowel and start again. If the gap under the gap is too large, remove the dowel, sand down the length a little and try again. When you are happy it is time to glue it together.
Remove all the pieces and start by rubbing a little wax on the dowel at the gear end for lubrication then put a little glue on one end of the dowel and a little up the side. Push it into the hole tightly. Remove any excess and then put the washer on, and then install the gear. Excess glue could freeze the gear in place! I recommend not using CA glue for these process. Using a toothpick put a little cabinet makers glue inside the cap hole, not too much, if the glue squirts out onto the gear it will possibly freeze it in place. The hole left by the drill bit centre should leave some space for the excess to go. Spin the gear again as a double check. If things are ok, let it dry. 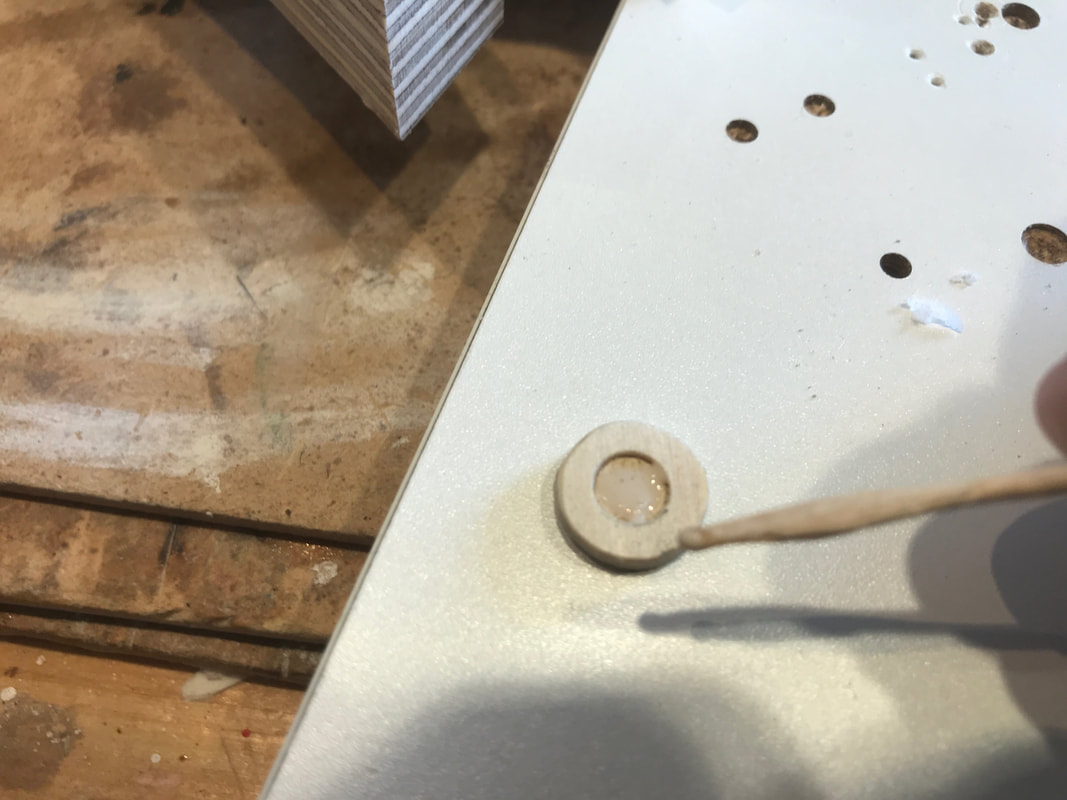 I use this technique in circumstances like this because I feel it gives me better control of the fitting and safer application of the glue. Conversely you can use a peg like the one shown below. These are usually available in the toy parts section of your local woodworking store. I often sand the head height down on these when using them. While you can still test fit things, when you apply glue on the backplate hole the operation is blind so the right amount of glue is important. Also the heads on these pegs tend to be smaller in diameter so I would usually add another washer under the head and wax the surfaces. The manufacturing tolerances on these things are not great sometimes so they can be tricky to get square when assembling as a whole assembly. and pulling things apart again is not right can be tough. Either method can work if you are careful. I prefer to use the first method for tighter control. Have fun either way! 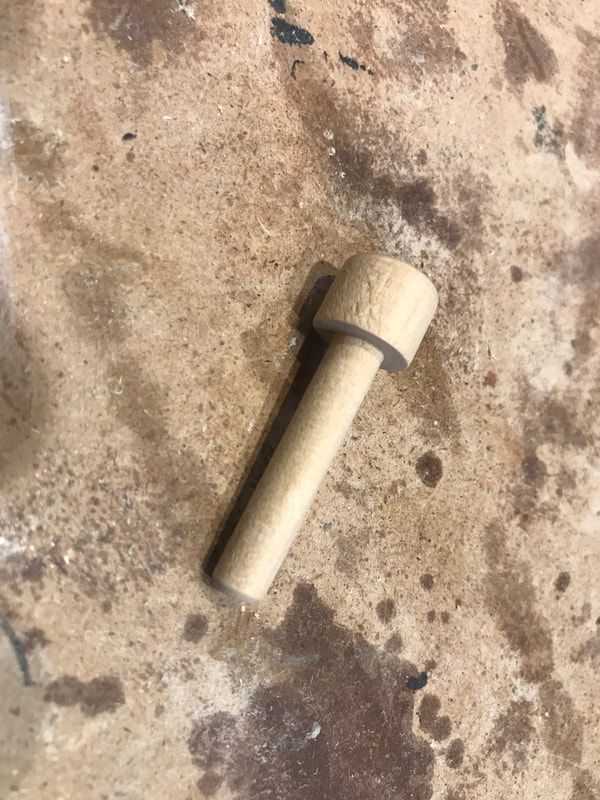
0 Comments
Leave a Reply. |
Why Automata?Automata is a creative blend of my life interests , engineering, art and woodworking. Archives
July 2022
Categories
All
|


 RSS Feed