|
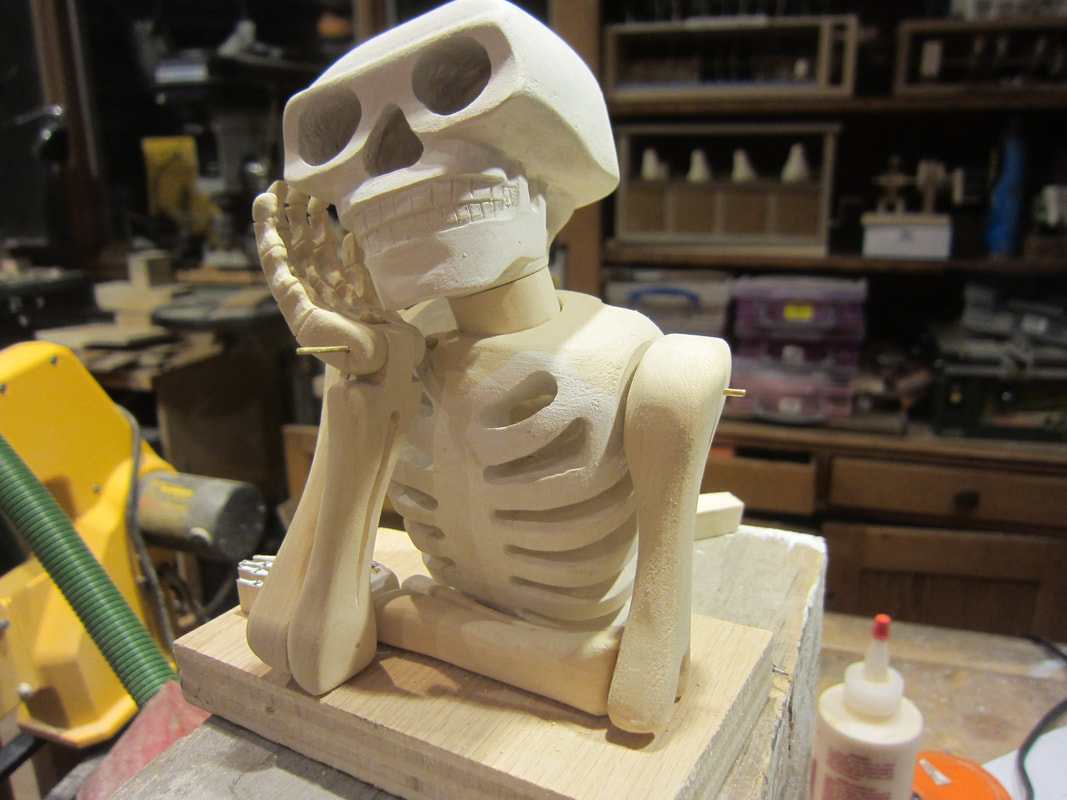
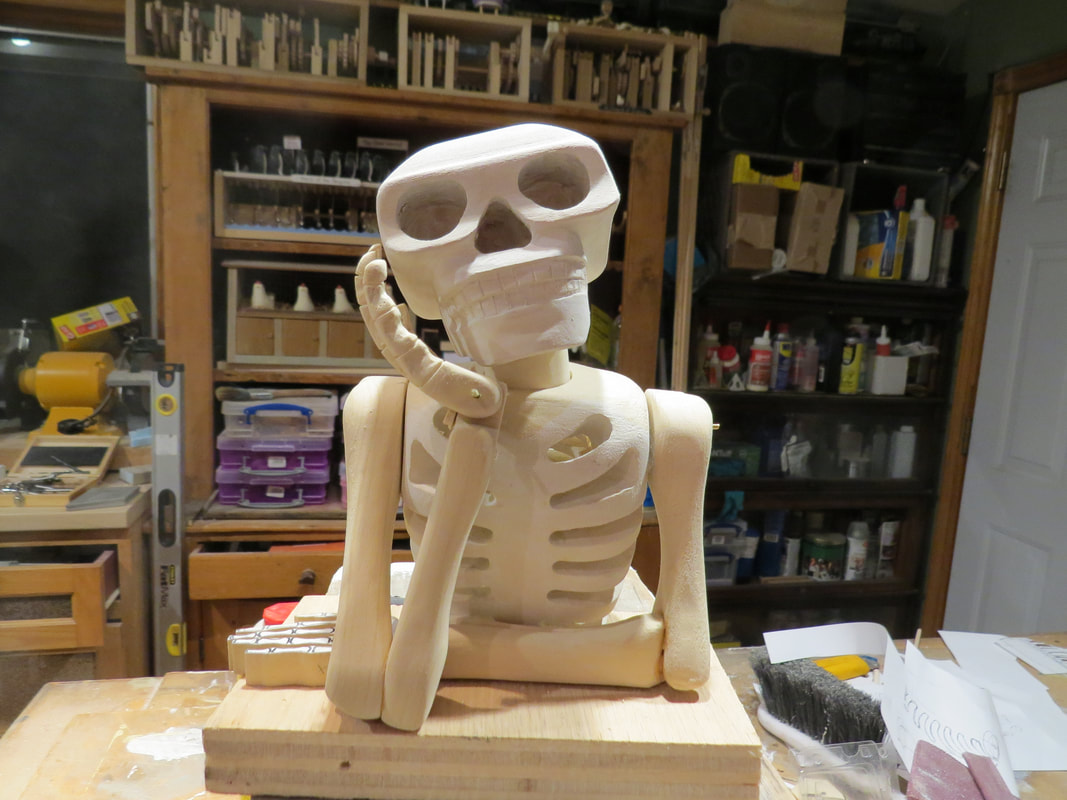
Added the skeleton's right arm today. Its a lot of finicky fitting to align the hand to be in the right place under the chin and match the left arm as closely as possible. Here is how he looks today with his parts stacked in place. Now let's talk about that change order. Sometimes when you are putting things together they don't quite end up exactly as expected. This is the case with the skeletons hand. Originally I had thought it would be tipped back enough that the actuator link could pass directly into the front of the chest cavity where I would attach a lever connected to the mechanism below. Well, it didn't end up well placed, so a redesign was needed.
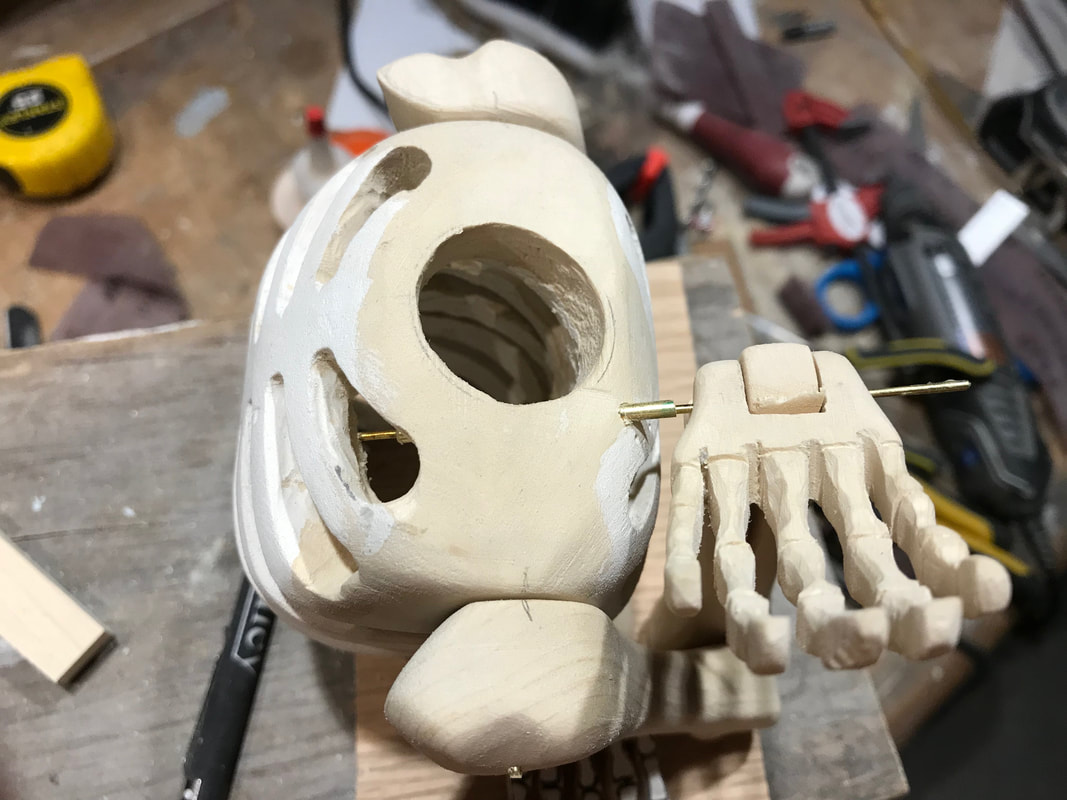
Half the fun of automata is problem solving. I seem to often revise something to make it work the way I envision it. In this cast the lever ended very high up on the torso and I had to design the mechanism to fit into the neck area. This required that the lever would be well behind the torso's centreline to have clear link access into the base. Now I began to worry about a long unsupported shaft and possible bending. In the photo below you can see a section of brass tube that the hand actuator will run through. This guide will support the rod inside so it doesn't bend. When fitted the front will be shaped to match the profile of the chest cavity. The other end will protrude slightly through the neck to act as a bearing surface for the lever arm not shown yet. The rod will fastened to the outer edges of the hand and spin freely through the hole in the arm bone. Here is the other fascinating part of automata building; how do you put it together? The mechanism will be built this way: 1. Insert the small brass tube and shape it to its final position. 2. Slide a length of the brass rod into the tube, longer than needed. 3. Pull the tube part way out. 4. Solder the linkage arm to the end of the brass rod while inserted, reaching down into the highest rib gap on the rear of the skeleton. 5. Let the solder harden. 6.Push the tube back into place and secure with some thin CA glue. 7.Slide the arm and hand into place onto the brass rod. 8. Mark the rod and cut it a little long, disassemble and bend a 90 degree bend in the end. ( Sometimes I rely on CA glue to hold a brass rod in wood, but in this case because it is a rotational motion, I want to notch the hand and cut in the 90 degree bend to prevent slippage and fill the hole.) 9. Put it back together and fill the hole where the rod is bent to hide it. 10. Lastly glue the arm to the torso at the shoulder ensuring a good alignment for the tube and the hand, clamping until dry. Don't put the neck plug back in yet, you will need to attach the link wire to the lever arm. Life is never simple in the word of contemporary automata!
0 Comments
Leave a Reply. |
Why Automata?Automata is a creative blend of my life interests , engineering, art and woodworking. Archives
July 2022
Categories
All
|


 RSS Feed